Privacy Fence on a Slope: Stepped vs Racked Installation
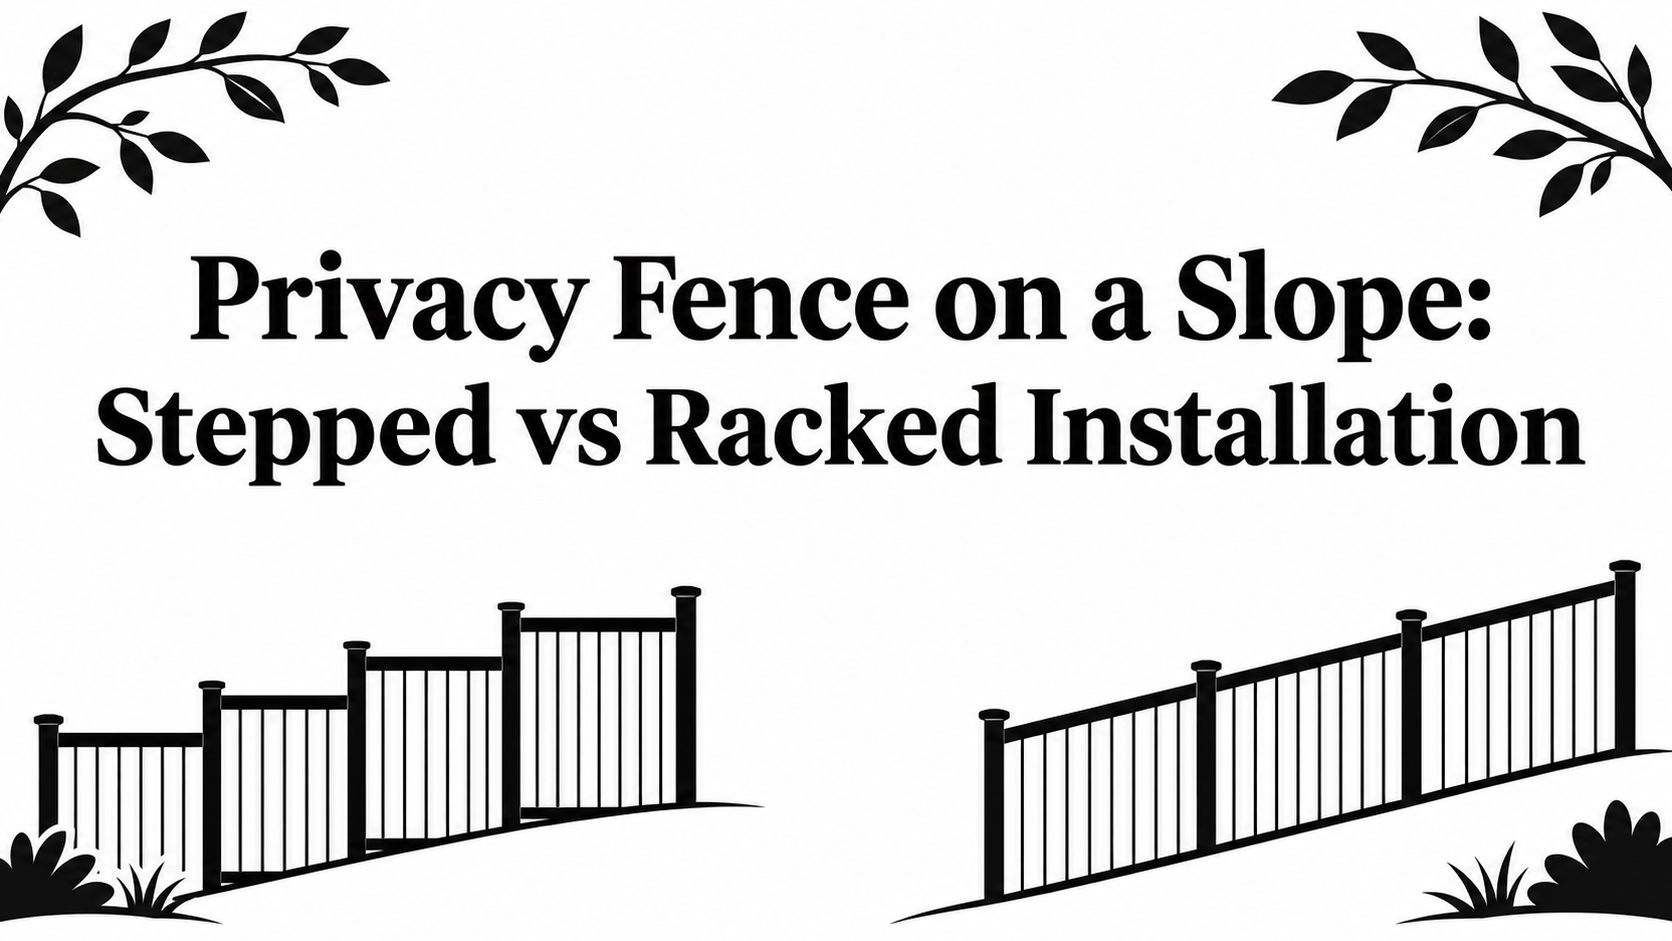
The bottom of the yard is where the problem shows up first. A post that looked fine in dry weather now has a puddle sitting against it, the panel above it has a finger's width of daylight underneath, and the gate drags on the ground two days after a hard rain. Nothing is broken yet. The grade is doing what grade does, which is move water and soil downhill, and the fence was laid out as though the ground were flat.
Most homeowners open with "step or rack the panels?" because that's the visible choice, and it is the right first question. What gets skipped is the set of limits that can overrule the answer: how long a run the grade allows before water concentrates, how a solid panel behaves on a ridge or in a flood path, how deep the downhill posts have to sit, what a pool barrier demands measured from the outside, and where the property line falls. The layout gets confirmed last. Run those checks and the stepped or racked decision usually makes itself.
Table of Contents
- Pick Stepped or Racked Before You Set Posts
- How Grade and Run Length Set Drainage Limits
- Wind, Flood and Fire Exposure on Steep Lots
- Post Depth and Spacing for Wind and Soil
- Close the Bottom Gap and Meet Pool Barrier Rules
- Keep the Fence and Footings Inside Your Line
- Confirm Your Slope Layout Before You Order
Pick Stepped or Racked Before You Set Posts
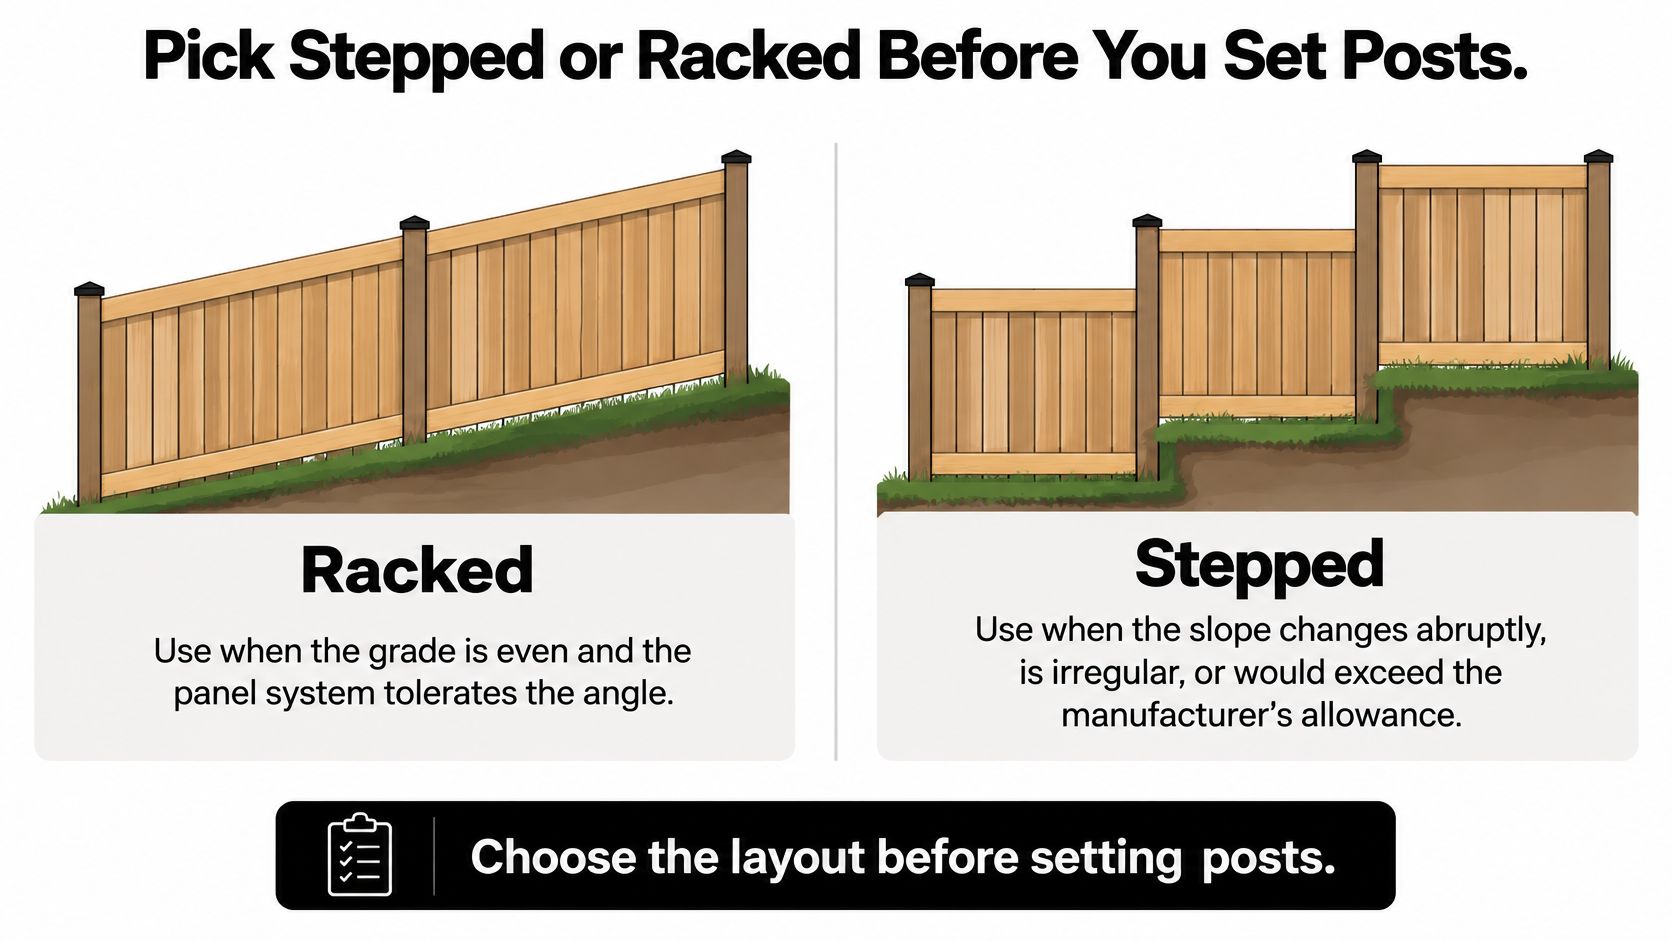
Rack the panels when the grade is even and the fence system tolerates the angle. Step them when the grade breaks abruptly, wanders irregularly, or demands more angle than the manufacturer allows. That answer holds across wood, vinyl, aluminum and chain link, with one caveat: every system publishes its own racking limit, and the panel you picked may settle the question before you reach the yard.
Eight-foot post spacing with a one-foot drop from post to post is a 12.5% grade, ordinary on lots that drain toward a swale or a canal. Rack that run and the panel rotates along its length, so the bottom edge tracks the soil and the screen stays continuous. Step it and each panel stays level while the post line drops, which opens a triangular gap under every panel, widest on the downhill side.
The two layouts differ in one motion. A stepped fence keeps each panel level and drops it at post locations. A racked fence follows the grade by rotating the panel along its length. Racking shrinks the triangular gaps but is capped by the manufacturer's maximum allowable angle, and it can cause clearance trouble at gates, retaining edges and sudden grade changes. Stepping handles irregular terrain and simplifies post alignment, at the price of the openings.
| Factor | Stepped layout | Racked layout |
|---|---|---|
| How the panel sits | Level panels that drop at each post | Panel follows the grade at a set angle |
| Gaps under panels | Triangular openings unless the bottom is graded or filled | Smaller gaps and a more continuous screen |
| Best terrain | Irregular, uneven or abruptly changing grade | Even, consistent slope |
| Main limit | Vertical drop at every post | Manufacturer's maximum rack angle |
| Gates and grade breaks | Easier post alignment at breaks | Clearance problems at gates and abrupt changes |
| Post length | Standard posts with a carefully detailed bottom edge | Often longer posts for sufficient embedment |
Settle the layout before the auger comes out
The practical sequence is to establish finished-grade elevations at every post, check the lowest panel-to-ground clearance, then divide long runs at major slope changes instead of forcing one continuous angle. A racked run often needs longer posts to reach adequate embedment at the low end, a point the steel privacy fence installation manual makes directly, and that manual recommends raking on sloping or uneven ground rather than stepping.
Even a correct-looking layout stays provisional until four limits are checked: how long a run the grade allows before water concentrates along the fence, whether the downhill posts still reach embedment, what clearance a pool barrier demands measured from the outside, and where the property line falls. A layout that fails any one of them gets redrawn on paper, not in the ground.
Where the fence is meant to hold soil back, stop. Lateral earth pressure, surcharge, drainage and foundation resistance are retaining-wall engineering, not a panel detail. The installation manual notes retaining-wall posts may need concrete-filled holes at least 12 inches in diameter to develop passive resistance, with drainage through a perforated pipe surrounded by drain rock and geotextile filter fabric. That scope of work belongs to an engineer.
Locked before digging: the layout is fixed before the first hole is augered. Changing it later means pulling and re-setting posts, and the new holes rarely line up with the old ones.
To measure grade yourself, run a string line between two posts and level it, then measure down to the soil at each end with a tape. Mark the finished-grade height at every post, divide the rise by the run and multiply by 100 for percent grade. Record those numbers on paper before choosing a layout, because every check above depends on them.
How Grade and Run Length Set Drainage Limits
Stepped or racked comes first, but grade decides how long each straight run can be before it starts acting like a curb. The federal erosion-control guidance publishes maximum slope lengths above a filter-fabric barrier, and the numbers show how fast a safe run shrinks as grade climbs.
| Grade | Max run, 18-inch barrier (ft) | Max run, 30-inch barrier (ft) |
|---|---|---|
| 2% | 250 | 500 |
| 5% | 100 | 250 |
| 10% | 50 | 150 |
| 15% | 35 | 100 |
| 20% | 25 | 70 |
| 30% or 40% | 15 | 45 |
Read the first column against the second and the message is blunt: an 18-inch barrier holds 250 feet of run at 2% grade but only 15 feet at 30% or 40%. Raise the barrier to 30 inches and the same grades allow 500 feet and 45 feet. Steeper ground shortens the safe run far faster than a walk across the yard suggests.
The reason matters as much as the table. Runoff moving parallel to a fence concentrates along its base, erodes the supporting soil and undermines the posts, which is why barriers belong along the land's contour. On a residential lot that becomes a fixed design rule: run the fence across the slope where you can, and never leave a long straight section where it can gather water along its base.
Sizing rule: a run longer than its grade limit gets split at the grade change. A longer panel line is not a fix.
A worked example on a 40-foot run
Take a 40-foot run on a 10% slope. It sits under the 50-foot limit for an 18-inch barrier, so one continuous section works, provided the ground at the low end sheds water away from the posts. Put the same 40 feet on a 15% slope and it exceeds the 35-foot limit, which is the cue to split it into two sections with a drainage break at the grade change rather than fighting the hill with one panel line.
Field checks matter as much as the arithmetic. The same guidance sets the support details: keep the top and bottom edges of each section level, drive support stakes at least 12 inches into the ground, and space them no more than 8 feet apart. Then walk the low end of every section after rain and mark where water collects.
Sediment movement on slopes is measurable. A U.S. Department of Agriculture field study on hillslope erosion plots captured 94% of transported material in the first year and 92% in the second, with an upslope concave pocket so runoff could not bypass the fence, as reported in the Agricultural Research Service publication. The transferable point is the pocket: give runoff somewhere to slow down and drop its load instead of letting it run along or under the fence line.
The decision rule stays simple. If a run exceeds its limit at your grade, plan a break, a swale crossing or terracing before you choose panels.
Wind, Flood and Fire Exposure on Steep Lots
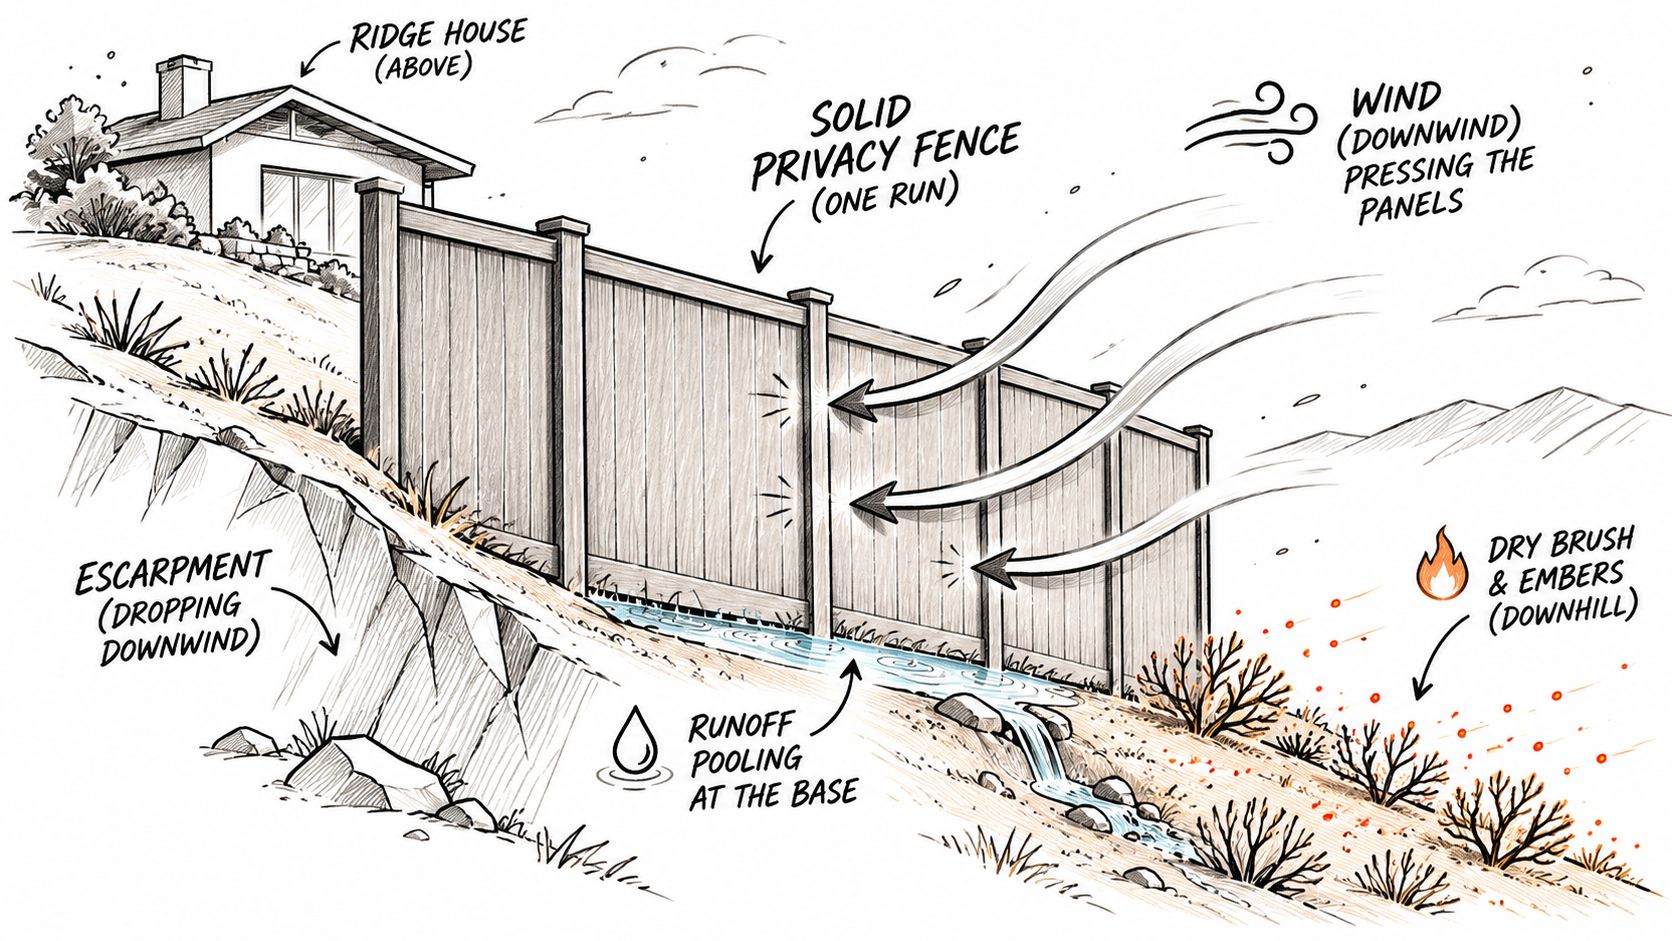
A solid 6-foot panel on a ridgecrest behaves nothing like the same panel on flat ground. Ridges, escarpments and swales raise wind and water loads well past what a flat-lot calculation assumes, and the steeper the ground, the less room the fence has to shed either one.
FEMA's residential-code compilation identifies special wind exposure near escarpments, where increased basic wind speed can extend downwind from the edge by 1.5 times the upwind slope length or six times the escarpment height, whichever is greater, and states that structures within the IBC scope must follow ASCE 7 wind-load provisions, per the FEMA residential building code compilation. A residential fence panel isn't engineered to ASCE 7. The panel still takes the pressure, which is why exposure gets checked before material, not after.
Flood exposure runs a different path. FEMA states that solid fences and walls may divert floodwater and waves toward buildings, while open fences with generous openings are generally presumed not to cause harmful diversion, per its free-of-obstruction technical bulletin. The same guidance notes that slopes of 1:3 or steeper can produce appreciable wave runup, and it gives typical site-drainage slopes of about 5% away from buildings.
Local drainage rules fill in the rest. Where a run crosses a swale or drainage path, code may limit how close a solid panel can sit to grade, because a panel touching soil works like a small dam and pushes water toward whatever sits downhill. I treat any run crossing a swale on steep ground as a wind problem and a water problem at once, and I confirm the local clearance rule before picking a panel style that follows grade.
Three checks, in this order
- Exposure. Is the run on a ridge, across a swale, or inside a mapped flood zone? That single answer rules out options before material choice matters.
- Porosity and height. A solid 6-foot panel blocks wind and water; a more open design lets both pass. Height multiplies the load on every post.
- Attachment to the house. A fence tied into a structure transfers load into the structure. Keep it free-standing unless an engineer signs off.
Fire follows the same geometry. Steep slopes and drainage corridors accelerate fire spread, so noncombustible fencing is the safer choice near structures on steep, drainage-prone lots. On a wooded lot with a steep drainage behind the house, a solid wood fence running all the way to the wall gives fire a direct path to the building. Storm season adds its own review, and the hurricane fence prep checklist for Florida properties covers what to inspect before the first named system.
Does a solid fence near a home or drainage need replacing? Sometimes it needs interruption, a gap, a different material, or a shorter return. The three checks plus local code settle that before posts are set, which is exactly when the stepped or racked layout gets confirmed.
Post Depth and Spacing for Wind and Soil
Load concentrates at the bottom of a slope. Runoff scours soil around downhill posts, reduces the embedment that holds them, and starts a slow lean that shows up long before a panel fails. Concentrated runoff can erode soil around downhill posts, reduce embedment support and cause progressive leaning even when the panels themselves stay intact, as noted in the UC Davis silt fence and erosion control reference. That downhill post is the first to get right and the first to check next spring.
Wind adds a second load. A solid privacy panel catches far more wind pressure than an open ornamental design, because air has to flow around or over it instead of through it. Privacy is the whole point of a solid panel, so perforating it is not the answer. Stronger anchorage and tighter post spacing are.
Post spacing should tighten as water and wind load rise. Use these planning ranges as a starting point, then confirm them against your local wind-load requirements:
| Load condition | Post spacing (ft) | When it applies |
|---|---|---|
| Water may overtop the barrier | 3-4 | Downhill runs in runoff or flood paths |
| Ordinary conditions | 5 | Typical residential slope with moderate runoff |
| Horizontal loading limited | 6-7 | Only where wind and soil loads are low |
Read the table as a principle rather than a specification: greater water or wind load demands closer supports and stronger anchorage.
The field sequence that works
- Dig the downhill post first. Check its depth against the panel height before the other holes are marked, because that post governs the run.
- Match spacing to the load tier. A downhill run in a runoff path gets the tight end of the range; a sheltered interior run can open up.
- Slope the concrete crown away from the post. Water should shed off the top of the footing instead of pooling around the base.
- Keep downspouts and driveway runoff off the fence line. Redirect roof and pavement drainage before you set posts, so the footing never sits in a concentrated flow path.
Where soil is loose or saturated, specify deeper or engineered post foundations rather than a bigger bag of concrete in the same shallow hole. Before ordering panels, verify local wind-load and setback requirements, since the right spacing depends on exposure and fence height, and a corner lot brings its own rules. Confirm all of this on paper first: the stepped or racked layout you chose only holds if the posts underneath it are sized and spaced for the loads at that exact spot on the slope.
Years of service live at the ground line. A panel that fails early usually traces back to a post that spent its first years sitting in wet soil.
Close the Bottom Gap and Meet Pool Barrier Rules
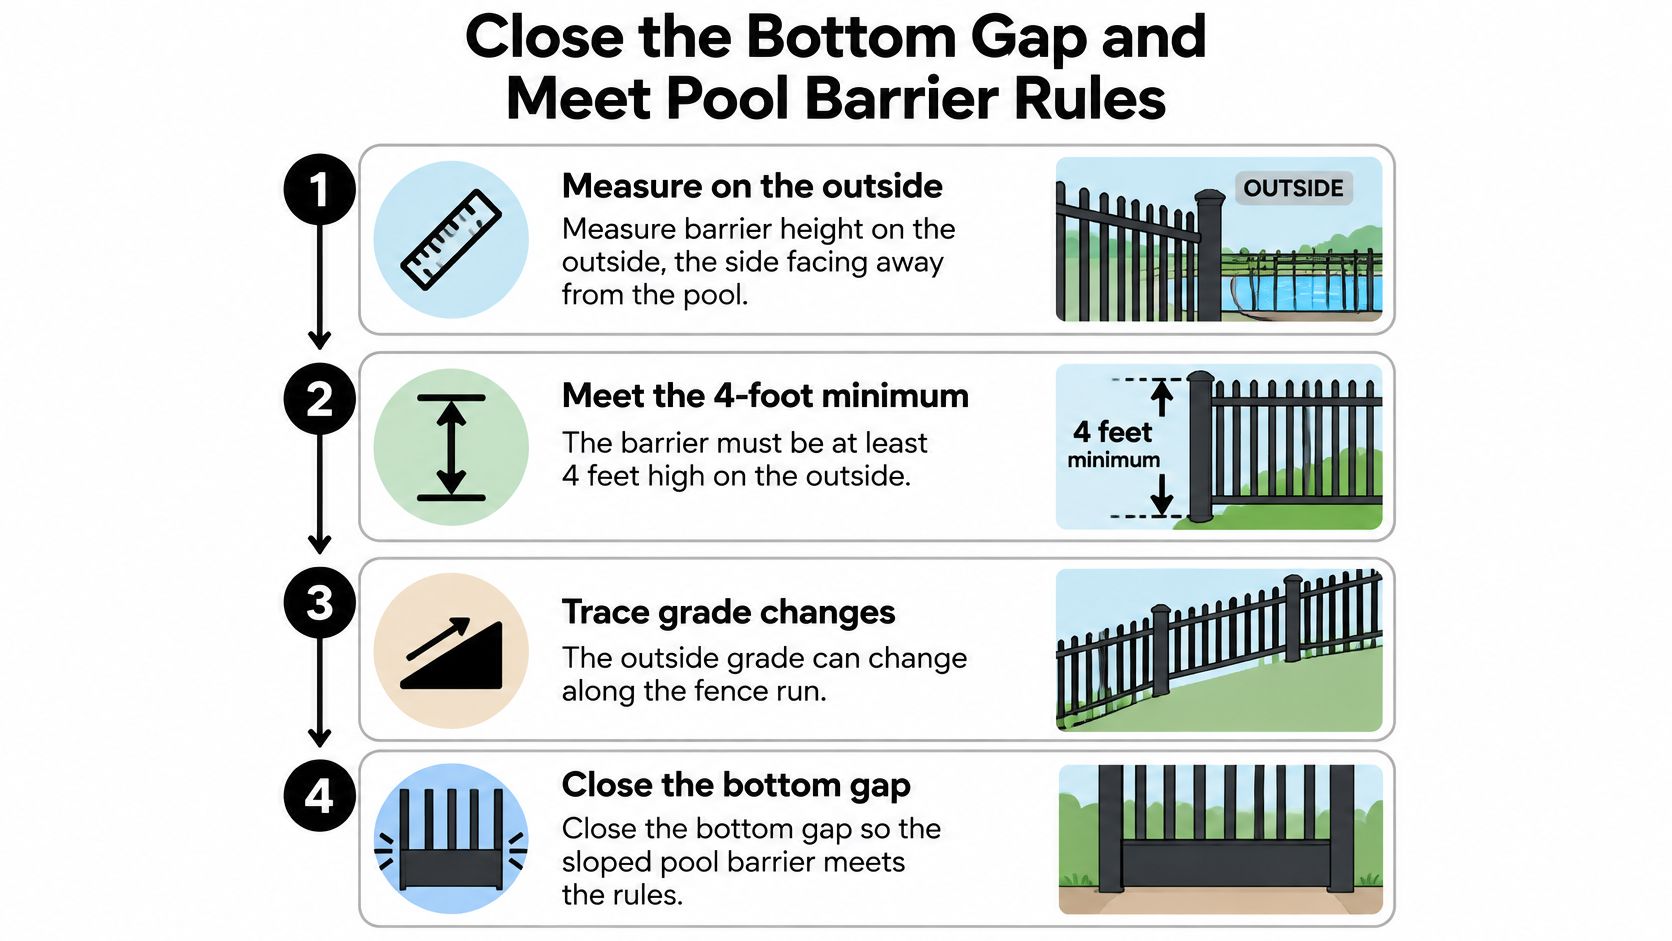
A pool fence on a slope answers to a different test than a boundary fence, and the measurement surprises people. Florida law requires the barrier to be at least 4 feet high on the outside, meaning the height is measured from the side facing away from the pool, as stated in Florida Statutes section 515.29. The same statute requires the barrier to run around the pool perimeter with no gaps, openings, indentations, protrusions or structural features that could let a young child crawl under, squeeze through or climb over.
The second number is the one that fails on slopes. Florida pool-barrier guidance sets a maximum vertical clearance of 2 inches between the bottom of the barrier and grade, measured on the side facing away from the pool, and identifies the same 48-inch minimum height in Florida Building Code materials for an effective barrier, per the Florida Department of Health pool barrier guidance. Step panels downhill and the wedge at the uphill or downhill edge can exceed that clearance unless the grade is shaped, the panel is adjusted or an approved infill detail goes in.
Six checks on the outside of the fence
- Measure outside grade at every post. The outside is the side facing away from the pool, and that's the surface the code measures from.
- Mark every spot where bottom clearance exceeds 2 inches. Paint a mark on the post so the fix list is visible.
- Regrade the low spots or adjust the panel. Shaping soil is usually cheaper and tidier than cutting a panel.
- Fill any remaining wedge with an approved infill detail. A loose board wedged in the gap is not a barrier component, and it won't survive an inspection.
- Check effective height at the high points of the outside grade. A panel that measures 48 inches at one spot can deliver less where the outside grade rises.
- Clear every climbable feature, then schedule the inspection. Horizontal rails, lattice tops and nearby furniture all count against you.
The gate finishes the job. Self-closing and self-latching hardware, positioned so a child can't reach the latch from the pool side, belongs in the same inspection visit. Compare the two fence types carefully: a privacy fence beside a pool often needs different bottom detailing from a boundary fence, even when both use the same posts and panels, and the Florida pool fence requirements spell out the rest of the hardware and height rules.
Keep the Fence and Footings Inside Your Line
The visible fence line is not the footprint. On a slope, footing excavation, concrete spread, grading and any retaining work reach beyond the face of the panels, and they reach toward the lot line. Fort Myers Beach guidance states that a fence may be erected up to the lot line, but no part of the fence, post or concrete may encroach over that line, and fences over 25 inches in height must follow established building-permit procedures, per the Fort Myers Beach fence and wall guidance. A downhill neighbor with a survey and a bad mood will find six inches of somebody else's concrete.
Offset the footings before you dig
- Locate the legal boundary from a survey or existing pins, not from the old fence.
- Mark the boundary, then an offset line on your side of it to cover the post and the concrete collar.
- Plan the stepped or racked alignment so the uphill footing stays inside that offset line at every post.
- Check permit height thresholds and HOA approval rules before ordering material, since a stepped run can read taller at one end.
A worked case: a 6-foot privacy fence along a rear boundary on a 12% slope, where the uphill post hole is set 30 inches deep and the concrete spreads about 6 inches past the string line. That post moves inward and the adjacent panel gets trimmed, which is a 20-minute fix before digging and a survey dispute after.
Separate scope: if the grade needs a retaining element to hold the fence line, that's an engineered design with its own drainage and foundation, not a fence detail bolted onto a panel.
A survey-based layout is worth the cost where grade changes concentrate excavation near the line, especially on side and rear boundaries where nobody looks until there's a problem. The guide to finding property lines for a fence walks through the survey and pin options.
Confirm Your Slope Layout Before You Order
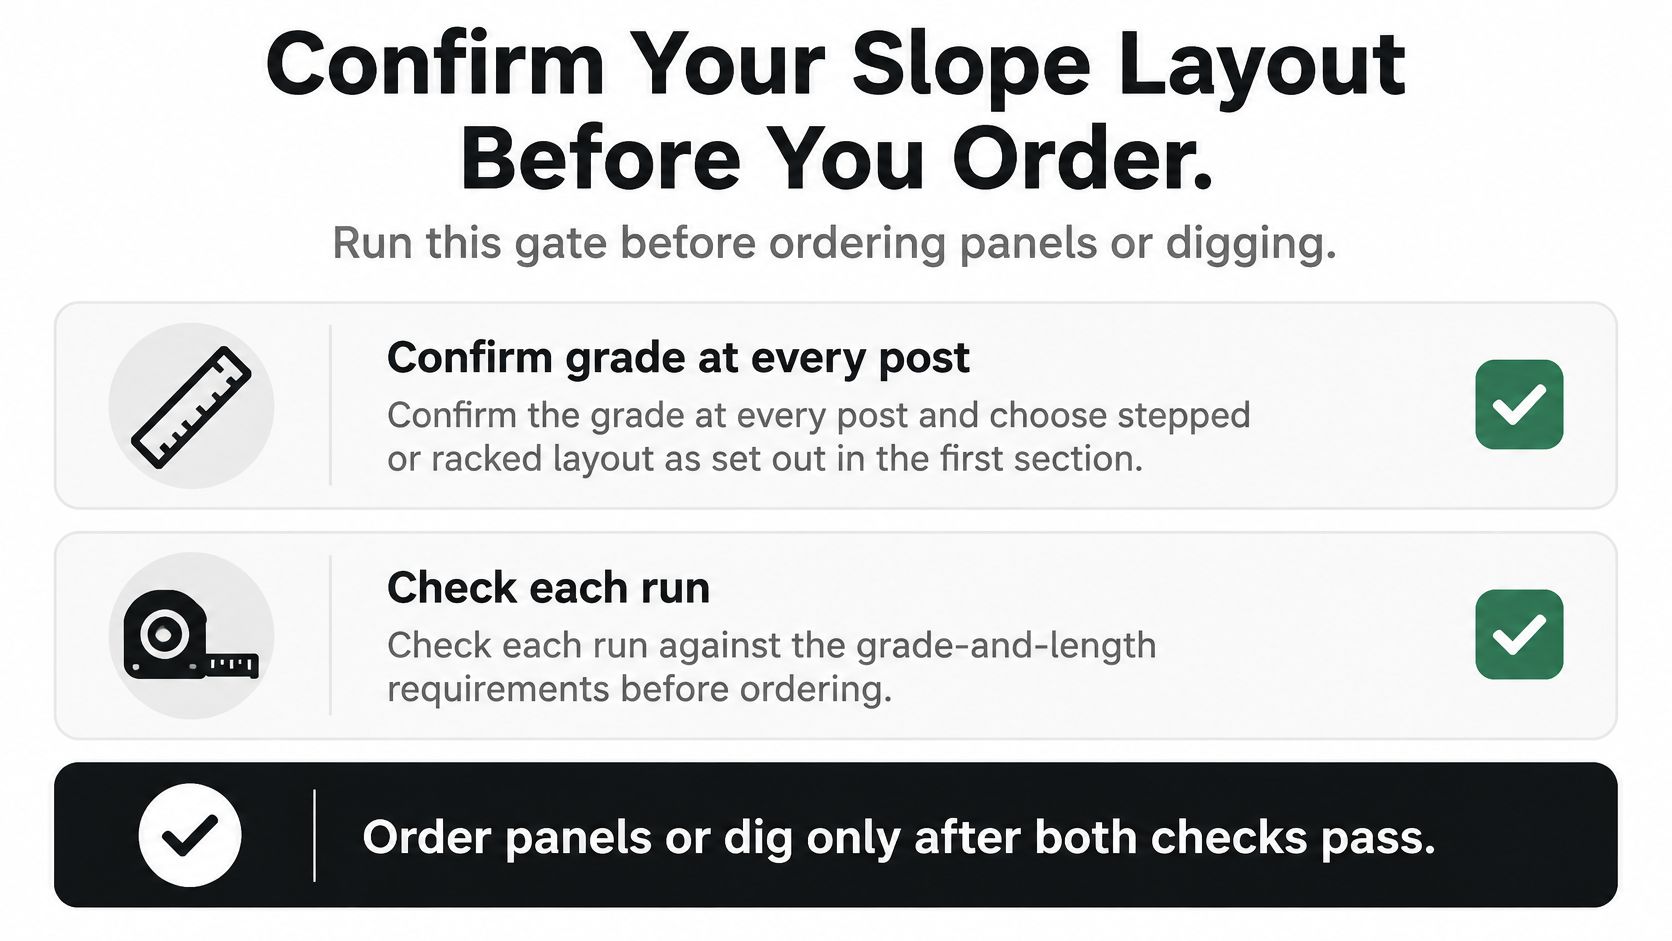
Run this gate before you pay for panels or dig a single hole. It's a pass-or-fail list, not a rough guide.
- Confirm grade at every post. Choose stepped or racked from the measured percentages, not from a look at the hill.
- Check each run against the grade-and-length limit. Where a section exceeds it, plan a break, swale crossing or terracing.
- Confirm post depth and spacing for the wind and soil load tier that matches the site.
- For a pool barrier, confirm 4-foot outside height, 2-inch maximum bottom clearance, and self-closing, self-latching hardware.
- Locate the legal boundary by survey or existing pins, and reserve room for footings and concrete on your side.
- Check swales, flood zone and fire exposure against local rules, plus any HOA design standards.
If any item fails, revise the slope plan before ordering. AlliedFenceAndGate.com™ publishes an online Fence Estimator that returns an instant ballpark price range from your specifications at no cost, and a free fence calculator gives an instant ballpark estimate with no email required in about two minutes. A site survey still confirms the final layout, since any planning estimate is only a rough figure.
#MartinCountyFencing #PalmBeachCountyFencing #TreasureCoastFence #StuartFL #JupiterFL #PortStLucie #HobeSound #PalmCityFL #PrivacyFence #PrivacyFenceOnASlope #FenceInstallation #VinylPrivacyFence #PoolFenceSafety #FenceContractor #SteppedVsRacked #SlopedYardFencing
AlliedFenceAndGate.com™ installs aluminum, PVC, chain link and wood fencing across Martin and Palm Beach Counties, including stepped and racked privacy runs, pool barriers built to Florida pool code, and the permitting, 811 utility locates and inspection coordination that go with them. When a yard drops a foot between posts, a site assessment pins down grade, footing depth and boundary offsets before any panel is ordered. Visit AlliedFenceAndGate.com™ to book an assessment for your slope and get the layout confirmed on paper first.
Related Fencing Services
Need a fence or gate on the Treasure Coast?
Licensed, insured, and bonded. Free estimates across Martin, St. Lucie, Indian River & Palm Beach counties.
Call (772) 530-3127