Pool Gate Safety: How to Adjust Self Closing Gate Hinges
Search for how to adjust self closing gate hinges and the same advice comes back from every corner: put a wrench on the tension pin, crank it a quarter turn, and the gate will close. It gets repeated because it's easy and because it sometimes looks like it works. It also fails the only test that matters on a pool barrier.
A hinge spring pulls a gate. It doesn't plumb a post, close a gap at the strike, or relocate a latch that's bolted in the wrong spot. Anyone who's spent an afternoon chasing a lazy gate with a hex wrench has learned the same lesson the hard way: the spring was never the problem.
The order that holds up is alignment first, latch geometry second, closing force last. In Florida that order isn't just good practice, it's written into the barrier requirements. The dimensions that keep a pool safe come from the frame and the latch placement. The hinge only decides how quickly the gate gets there.
Table of Contents
- Pool Gate Rules Your Adjustment Must Meet
- Aligning the Gate Before You Change Tension
- How to Adjust the Hinge Tension Step by Step
- Diagnose Symptoms and Know When to Stop Adjusting
- Test the Latch Before You Call It Done
Pool Gate Rules Your Adjustment Must Meet
A pool gate can close reliably and still violate a safety requirement. Florida's 2020 Building Code sets limits that hinge tension cannot correct. Check the gate's dimensions and operation before treating an adjustment as the fix.
| Requirement | Florida 2020 Building Code value | How to check after adjusting |
|---|---|---|
| Gate height | At least 48 in (1,219 mm) | Measure from the walking surface to the top of the gate |
| Swing direction | Outward, away from the pool | Confirm the gate opens away from the water |
| Closing action | Self-closing | Check that the gate closes on its own |
| Latching | Self-latching, with the release positioned so a young child cannot reach it from outside the barrier | Confirm the latch engages and check the release position |
For a plain-language overview of the rules, see this guide to Florida pool fence requirements.
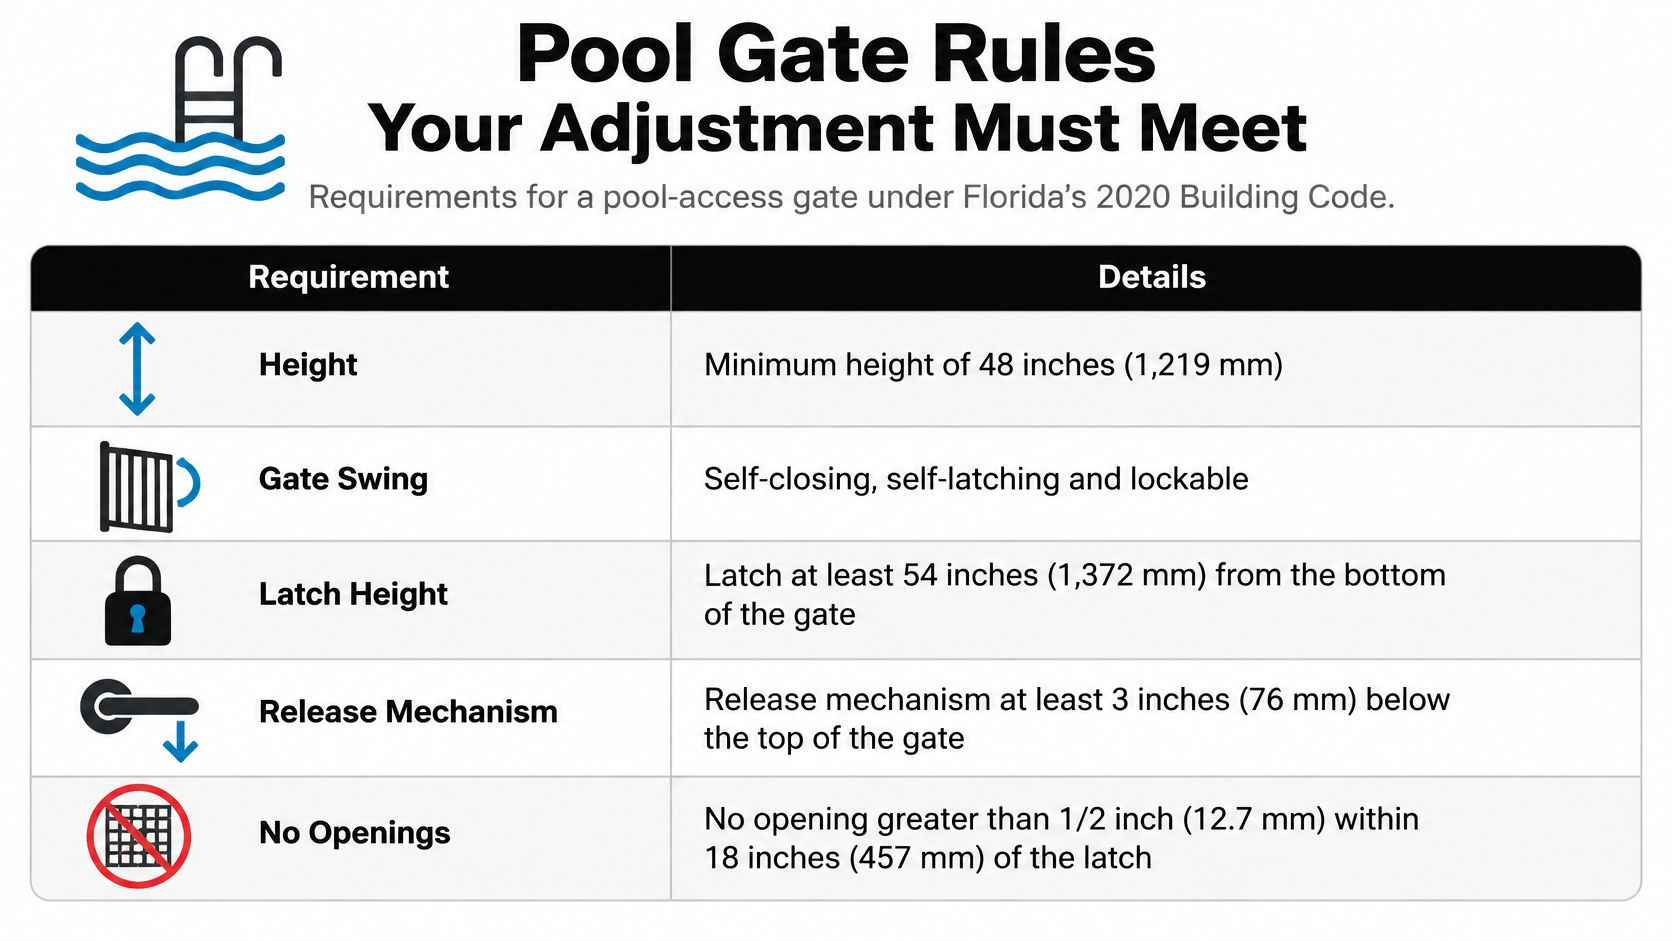
The 2020 Florida Building Code provision for pool access gates requires a 48 inch (1,219 mm) minimum gate height, self-closing and self-latching operation, and a release that a young child cannot reach from outside the barrier. The gate must swing outward, away from the pool.
Hinge tension controls closing action. It does not change gate height, move the latch release, or reverse the direction the gate swings. Those requirements depend on the gate and latch installation, so more spring tension cannot correct a latch mounted in the wrong place or a gate that opens toward the pool.
Check the latch geometry against the code before adjusting the spring. The gate needs to close on its own and engage the latch; the release must also remain out of reach from outside the barrier. If that placement is wrong, adjust or relocate the latch hardware rather than trying to compensate at the hinge.
Aligning the Gate Before You Change Tension
A gate that drifts, binds or stops short of the latch has an alignment problem until proven otherwise, and alignment is where the repair budget should go first. Work through these steps in order. Skipping ahead to the spring is how a ten-minute fix turns into a hardware replacement.
- Support the gate. Slide a jack or temporary shims under the latch side so the gate's weight is off the hinges while you work. A gate that's hanging on loaded hinges won't tell you the truth about its own alignment.
- Check plumb and gaps. Verify both posts are plumb and that the hinge-side and latch-side gaps look the same at the top and the bottom. A post that has shifted in its footing throws off every adjustment downstream.
- Loosen only enough. Back the hinge fasteners off just enough to move the hinge body. Fully removing them lets the gate drop and resets the problem you're trying to solve.
- Swing it dry. Align the gate so it travels its full arc without touching the post, the paving or the latch receiver. Contact anywhere in that arc is friction, and friction beats spring tension every time.
- Tighten from the top down. Snug the upper hinge first, then the lower one, in stages rather than one hard turn.
- Balance paired hinges. On a two-hinge gate, adjust the spring or tension setting in small, equal increments so the load stays even. Uneven settings twist the gate as it closes.
- Test from several angles. Wide open, half open, and barely open. The barely-open test is the one most homeowners skip and the one inspectors run.
The U.S. Consumer Product Safety Commission's gate-testing rule evaluated hinge and latch durability with 2,000 complete open-and-close cycles, which is a fair field benchmark for how hard you should test before calling a gate done.
The closed-angle bolt isn't a tension control
Many gate hinges carry a separate carriage bolt that sets the gate's closed angle, which is a geometry adjustment, not a spring adjustment. Turning the tension pin while the closed angle is wrong is fighting the gate instead of fixing it. Set the angle so the gate meets the latch receiver squarely, then use tension only for the last few degrees of travel.
What excessive spring force does to a sagging frame
Loading a sagging frame with spring tension produces the opposite of what people expect: accelerated wear at the hinge knuckles, hard closing, latch bounce, and fasteners that work loose over a season. The sign that a gate is square is simple. The hinge-side gap and the latch-side gap look the same from both sides of the fence.
How to Adjust the Hinge Tension Step by Step
Tension work starts after the gate swings clean and meets the latch squarely. The sequence below comes from a manufacturer's installation instructions, and it applies to hinges with a real tension-adjustment mechanism rather than a fixed spring.
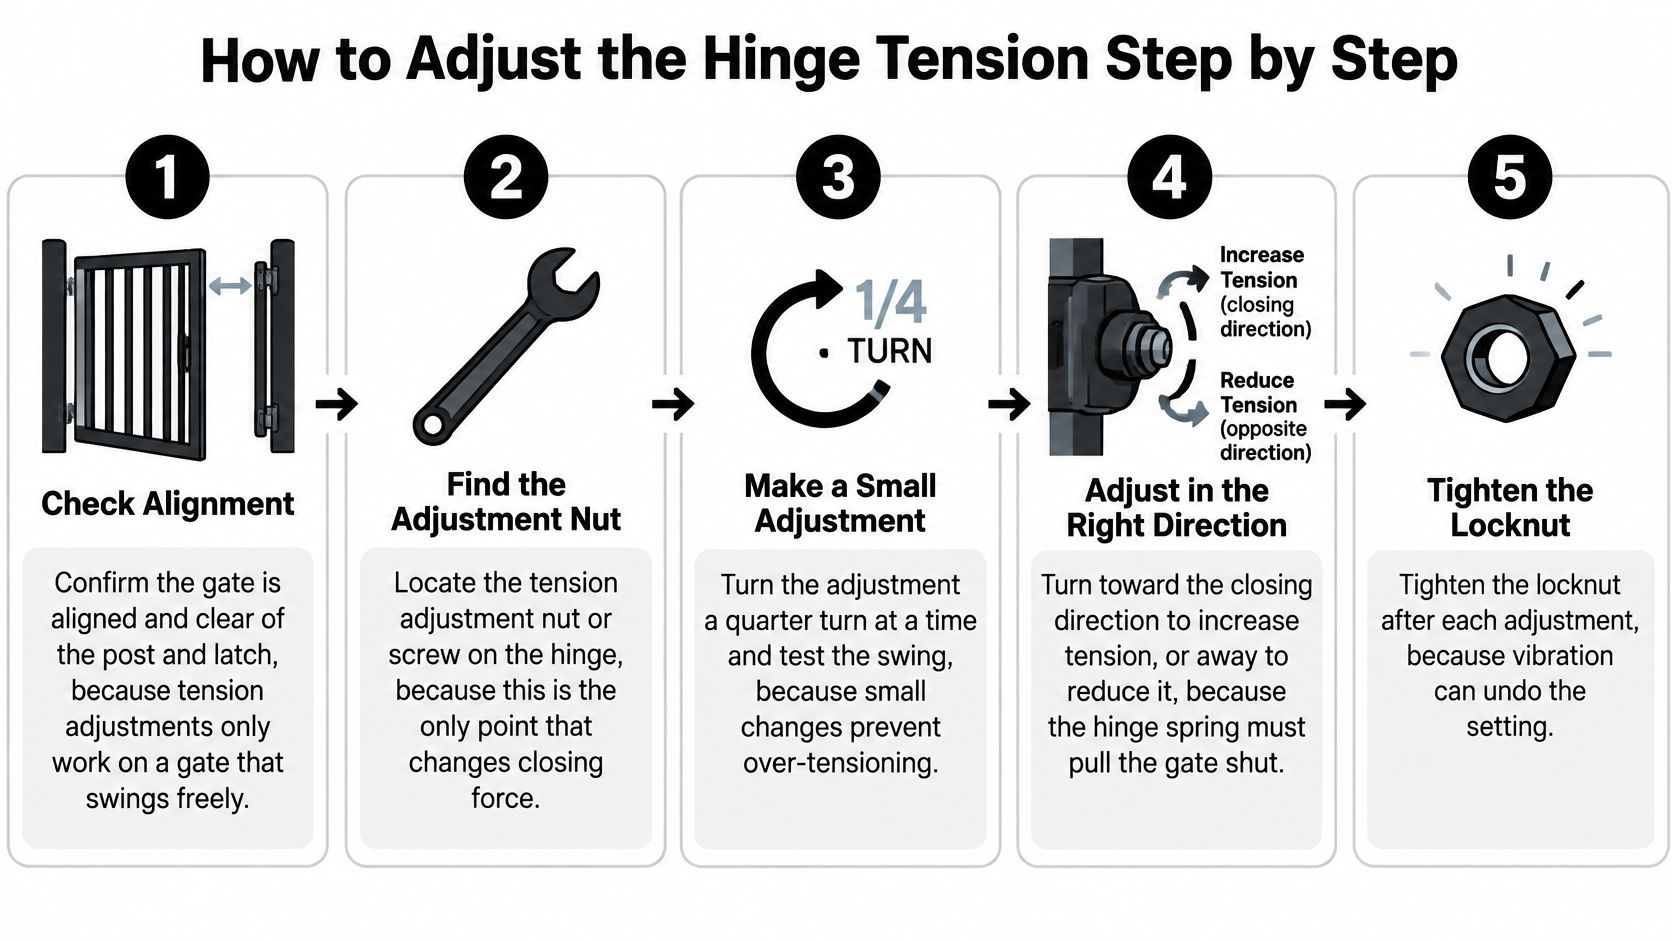
- Confirm the gate is aligned and clear. Spring force cannot pull a gate past a binding frame, a dragging bottom rail or a misaligned latch receiver. Finish the alignment work first or the rest of this list is wasted effort.
- Identify the hinge type. The manufacturer's wrap hinge installation guide describes a calibrated spring-tension mechanism with an adjustment pin under a cover. A hinge with no adjustment pin can't be tuned this way, and no amount of encouragement will change that.
- Pull the cover. The pin sits underneath, and the cover has to come off before any tool touches the mechanism.
- Turn one quarter turn. Insert the supplied Allen wrench into the pin, press it down, and rotate toward the plus mark to increase closing force or toward the minus mark to reduce it. The quarter turn is the whole point: it's a repeatable unit that stops you from making a large, uncontrolled change you then have to chase back.
- Replace the cover and test the full travel. Watch the last foot of the swing, where the gate meets the latch. That's where problems show up.
- Repeat only if the gate still fails to close and latch. Stop immediately if it starts slamming, binding, or stressing the post. Those are signs you're solving the wrong problem.
Adjust paired hinges by the same amount so the gate stays balanced. Waterson USA's gate hinge adjustment guide notes that top-hinge tension can be set to levels 2, 3 or 4 depending on gate weight, with the bottom swing-speed nut adjusted using a 3 mm wrench, so the numbers on your hinge may not be quarter turns at all. Read the label on the hardware in front of you rather than assuming.
What not to do
Turning the pin toward minus until the gate stops closing on its own disables the self-closing function. The same manufacturer guide states that plainly, and on a pool gate that setting is incompatible with Florida's requirement that access gates close automatically. Over-loosening can also damage the internal spring, which turns an adjustment into a replacement.
The right setting depends on gate width, weight and wind exposure, plus hinge alignment and latch friction. A wide gate on an exposed corner needs more stored energy than a narrow one sheltered by a hedge.
What a finished adjustment sounds like: a quiet, controlled close that ends in a firm click at the latch, with no rebound off the striker.
What good closing looks like
A correctly tensioned gate doesn't hustle. It swings at an even pace, decelerates before the strike, and settles into the latch without bounce. If the gate speeds up as it closes, the spring is doing too much and the latch will take the punishment.
Diagnose Symptoms and Know When to Stop Adjusting
A gate that moves under spring force can still miss its latch. Check the fault before changing tension, because added force cannot correct a sagging gate, a shifted post, friction, an incorrect closed angle or a latch that is out of line.
| Symptom | Likely cause | First fix |
|---|---|---|
| Closes but misses the latch | Sagging gate, latch out of line or wrong closed angle | Realign the gate, then adjust the latch and closed-angle bolt |
| Slams shut | Tension set too high | Back off one quarter turn on both hinges and retest |
| Closes only when pushed | Binding, poor alignment or insufficient tension | Check for binding and alignment first, and do not add tension until the post, hinge brackets, latch and swing path are confirmed clear |
| Latch bounces back | Excess spring force or loose fasteners | Reduce tension one quarter turn and tighten fasteners from upper hinge down |
| Drifts open | Post movement or uneven gaps | Verify the post is plumb and gaps are even, then retest |
| Stiff or squeaking hinge | Corrosion or dry pivot | Clean and lubricate the pivot; replace any hinge with corrosion damage |
Why more tension makes the gate slam but still miss the latch
The cause is mechanical. Spring force cannot correct sagging, post movement, friction, an incorrect closed angle or a latch that is out of line. More force sends the gate toward the same wrong position faster, increasing impact without fixing the geometry.
Practical rule: If a gate slams and still misses, take a quarter turn back off and recheck the latch and closed angle. Do not add tension to solve a positioning fault.
Follow the hinge manufacturer's instructions for the hardware you have. The Bunnings tension adjustment guide advises turning adjustment nozzles no more than a quarter turn at a time and using a stop to prevent the gate opening beyond 90 degrees. A gate that swings past its designed arc can load the spring in a direction it was not designed to take. Make small changes, keep paired hinges balanced, and stop if the hinge or its mounting shifts.
What hinge tension cannot fix
A gate that swings shut is not necessarily compliant as a pool gate. Section 515.29 on pool safety features requires pool-access gates to open outward, close automatically and have a self-latching locking device positioned so a young child cannot reach the release from outside the barrier. Hinge adjustment cannot correct an inward-swinging gate, an oversized gap, a latch mounted too low or structural movement in a post. Those are code, placement or structural problems, not spring settings.
Stop turning the wrench when: the gate still needs a push after the alignment and swing path have been checked, or the hardware moves under hand pressure. A loose bracket, worn hinge or misaligned latch needs repair rather than more tension.
Should the hinges keep getting tighter if the gate only closes when pushed?
No. A gate that needs a push points to a problem that should be diagnosed before tension is changed. Check that the post is plumb, the hinge brackets and latch are aligned, the swing path is clear, and the hinge knuckles are free of corrosion. If the hardware is loose, or the gate will not close and latch reliably, take a pool gate out of service until it is inspected or repaired. Tension cannot make a loose or misaligned assembly safe.
Coastal hardware and the corrosion cycle
Humid, salt-exposed air can accelerate corrosion. Look for rust staining around hinge knuckles, fasteners that will not hold, and posts that shift under the gate's weight. Repeatedly changing tension on corroded hinges does not restore worn hardware. If a hinge is beyond adjustment, replace it with stainless steel or marine-grade hardware. This guide to gate hinges and hardware explains what to consider when choosing replacement parts.
Hinge or latch replacement through AlliedFenceAndGate.com™ costs $200 to $600. Diagnosis is done on-site, common replacement parts are carried for gate repairs, and most repairs are completed in the same visit. A worn hinge or latch may need replacement, while a sound, aligned hinge may only need adjustment.
#PoolGateSafety #SelfClosingGate #GateHingeAdjustment #PoolFence #PoolCodeCompliance #GateRepair #FenceContractor #PoolFenceInstallation #MartinCountyFencing #PalmBeachCountyFencing #TreasureCoastFencing #StuartFence #JupiterFence #HobeSoundFence #PalmCityFence #TequestaFence #JensenBeachFence
Test the Latch Before You Call It Done
The final test is pass or fail, not "looks better than it did." Run it in this order and keep score on paper.
Open the gate to wide open, half open, and barely open. Release it from each position without a hand on the frame, and watch three things every time: whether it closes on its own, whether it enters the latch without slamming, and whether it's still latched ten seconds later.
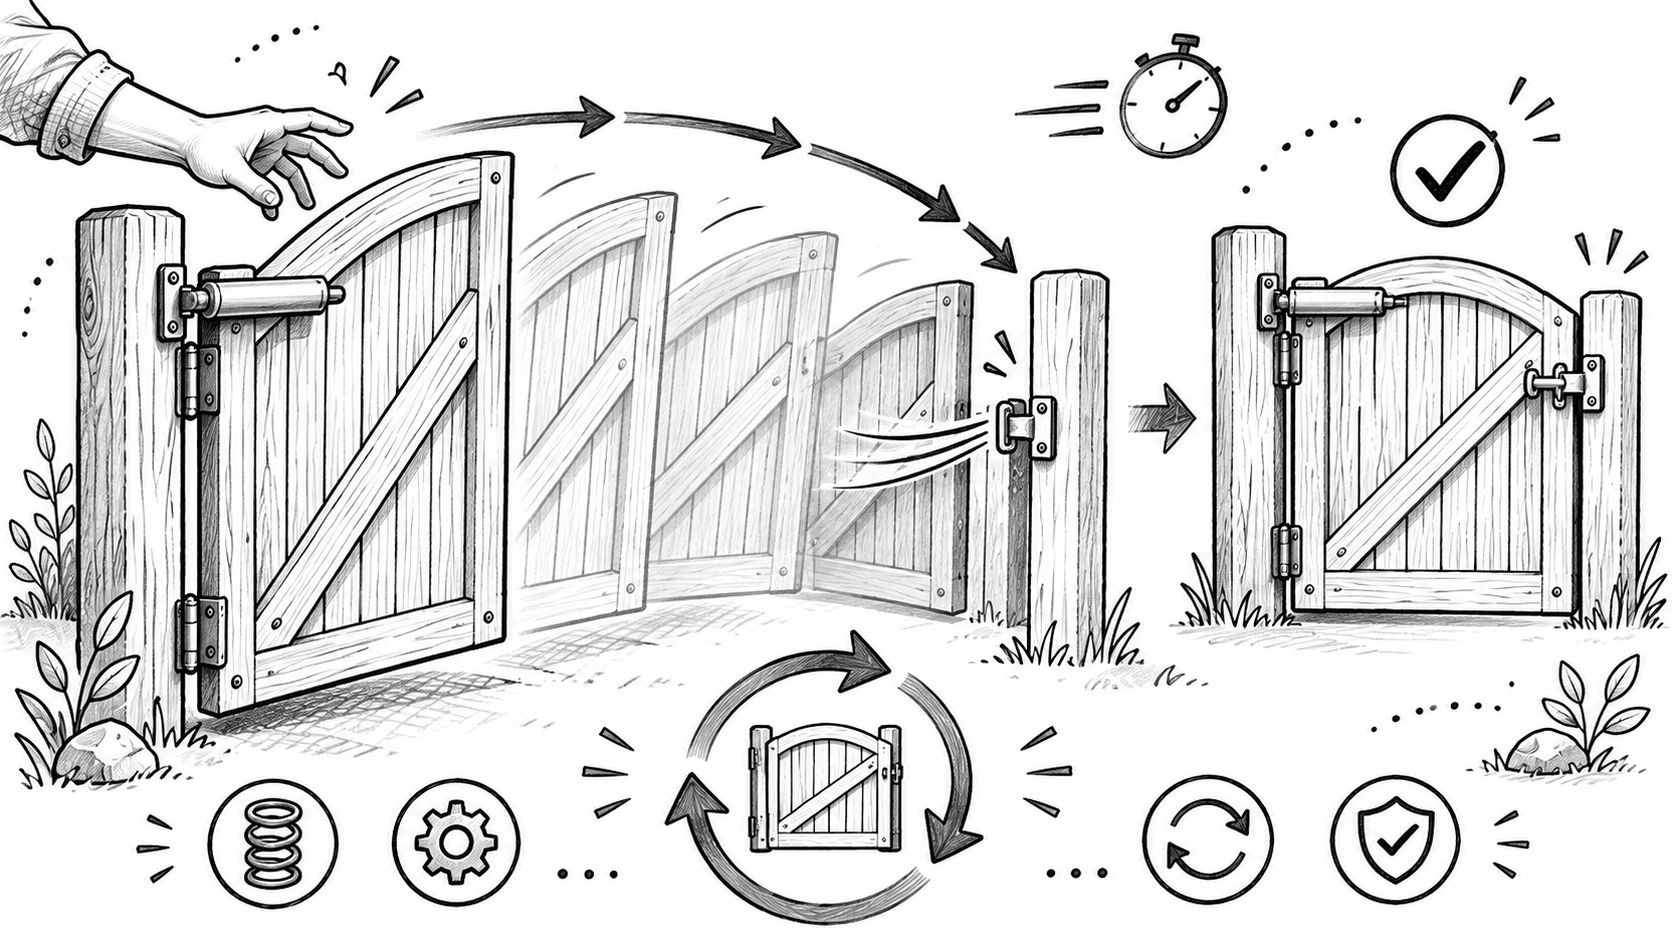
Repeat the cycle far more often than feels reasonable. Hinge and latch faults often hide until the twentieth or thirtieth open-and-close, which is exactly why a quick once-over misses them. A gate that latches eight times and misses the ninth isn't fixed.
Here's the pass list. Every line has to hold:
- Closes automatically from every opening angle, including the barely-open one.
- Latches on every cycle, with a clean click rather than a graze off the striker.
- No bounce back off the latch receiver.
- No contact with the post, the paving or the latch housing anywhere in the swing.
- Fasteners stay tight, with no movement at the hinge plates when the gate is worked by hand.
- Release sits on the pool side, with a lock that works and a gate that opens away from the water.
If every line holds, the job is done. Recheck after the first few weeks of use and again after a storm, since new hardware settles and posts shift. Anyone who wants the code background on what a compliant latch looks like can read this pool safety gate latch guide.
If a line fails, classify it before picking up a tool. Tension problems are the ones a homeowner can solve with a quarter turn and a retest. Alignment problems, corrosion and structural movement are inspection or replacement territory. A pool gate that fails the latch test stays out of service, and it stays out of service until it passes, because the barrier either works or it doesn't.
AlliedFenceAndGate.com™ installs and repairs self-closing, self-latching pool gates to Florida Building Code across Martin and Palm Beach Counties, using stainless steel and marine-grade hardware built for humid, salt-exposed sites. When a hinge is worn past adjustment or a latch sits where the code doesn't allow, the fix is a replacement part and a proper install, not another quarter turn. Visit AlliedFenceAndGate.com™ to book an on-site gate inspection or get a quote on pool-code hardware for your barrier.
Related Fencing Services
Need a fence or gate on the Treasure Coast?
Licensed, insured, and bonded. Free estimates across Martin, St. Lucie, Indian River & Palm Beach counties.
Call (772) 530-3127