ADA Railing Details for Florida Properties
A 34-to-38-inch handrail can measure perfectly and still fail an inspection. Under the 2010 ADA Standards for Accessible Design, the rail also has to maintain the right grip, continuity, extensions, returns, clear width, and relationship to landings and edge protection. That's why reliable ADA railing details start with the entire accessible route, not a tape measure held against one post.
Florida projects add another layer. Coastal exposure, drainage, narrow retrofits, doors, pool decks, HOA approvals, the Florida Building Code, and local permits all affect the finished installation. The practical sequence is straightforward: identify the applicable standard, measure the route, separate handrail duties from guard duties, choose materials for the site, then inspect every termination and clearance before requesting final approval.
Table of Contents
- Why ADA Railing Details Matter in Florida
- The ADA Framework and Which Edition Applies
- Handrail Height, Grip, and Clearance Specifications
- Handrails Versus Guards and When Both Are Required
- Ramp Geometry That Triggers the Handrail Rule
- Continuity and Extension Rules at Top and Bottom
- Best Materials for Coastal Florida Railing Installations
- Federal ADA, Florida Building Code, and Local Permits
- New Construction Versus Alterations and Retrofits
- Inspection Checkpoints That Catch Failed Railings
- Quick Reference for ADA Railing Details
- Common Questions About ADA Railing Details
Why ADA Railing Details Matter in Florida
A few inches decide whether an ADA rail passes or fails. On Florida jobs, I see the same miss over and over. Teams order one railing package and treat every edge, ramp, and stair the same, even though a handrail and a guard do different work and are checked differently in the field.
That distinction matters before the first post is drilled. A handrail is there for grasp and support along an accessible route. A guard is there to protect a raised edge. Confuse the two, and the layout starts drifting early. The fabricator may allow for panel infill and thicker members but miss the grip profile or return. The installer may hit the handrail height and still pinch the clear route. An owner may order a guard where the project needs a graspable handrail, or install a handrail beside a raised edge without proper protection.
In practice, inspectors do not look at one dimension in isolation. They follow the route. They look at where the run starts, whether the rail is continuous, whether the landings have room for extensions, whether brackets cut into usable width, and whether the rail returns safely instead of creating a catch point. The ADA Standards for Accessible Design set the federal framework, and The U.S. Access Board ramp guidance is useful when ramp geometry and landings start tightening up.
Florida adds jobsite conditions that federal diagrams do not cover well.
Salt air, wet pool decks, wind exposure, drainage, and tight retrofit footprints all affect what works after inspection, not just on paper. In coastal areas, a finish that looks fine at turnover can start creating maintenance problems fast. I prefer to sort out material choice, bracket projection, returns, and edge protection before shop drawings are released, because those trade-offs are harder to fix once anchors are set.
The short version is simple. ADA railing details are system details, not single-point measurements. If the inspection sequence is not built into design, fabrication, and install, the rail can measure correctly and still fail.
The ADA Framework and Which Edition Applies
On rail jobs, the first paperwork mistake usually shows up in the shop. If the drawings do not state whether the work is new construction or an alteration, crews can fabricate a compliant-looking rail that still fails review once the inspector traces the accessible route.
Document the standard before fabrication
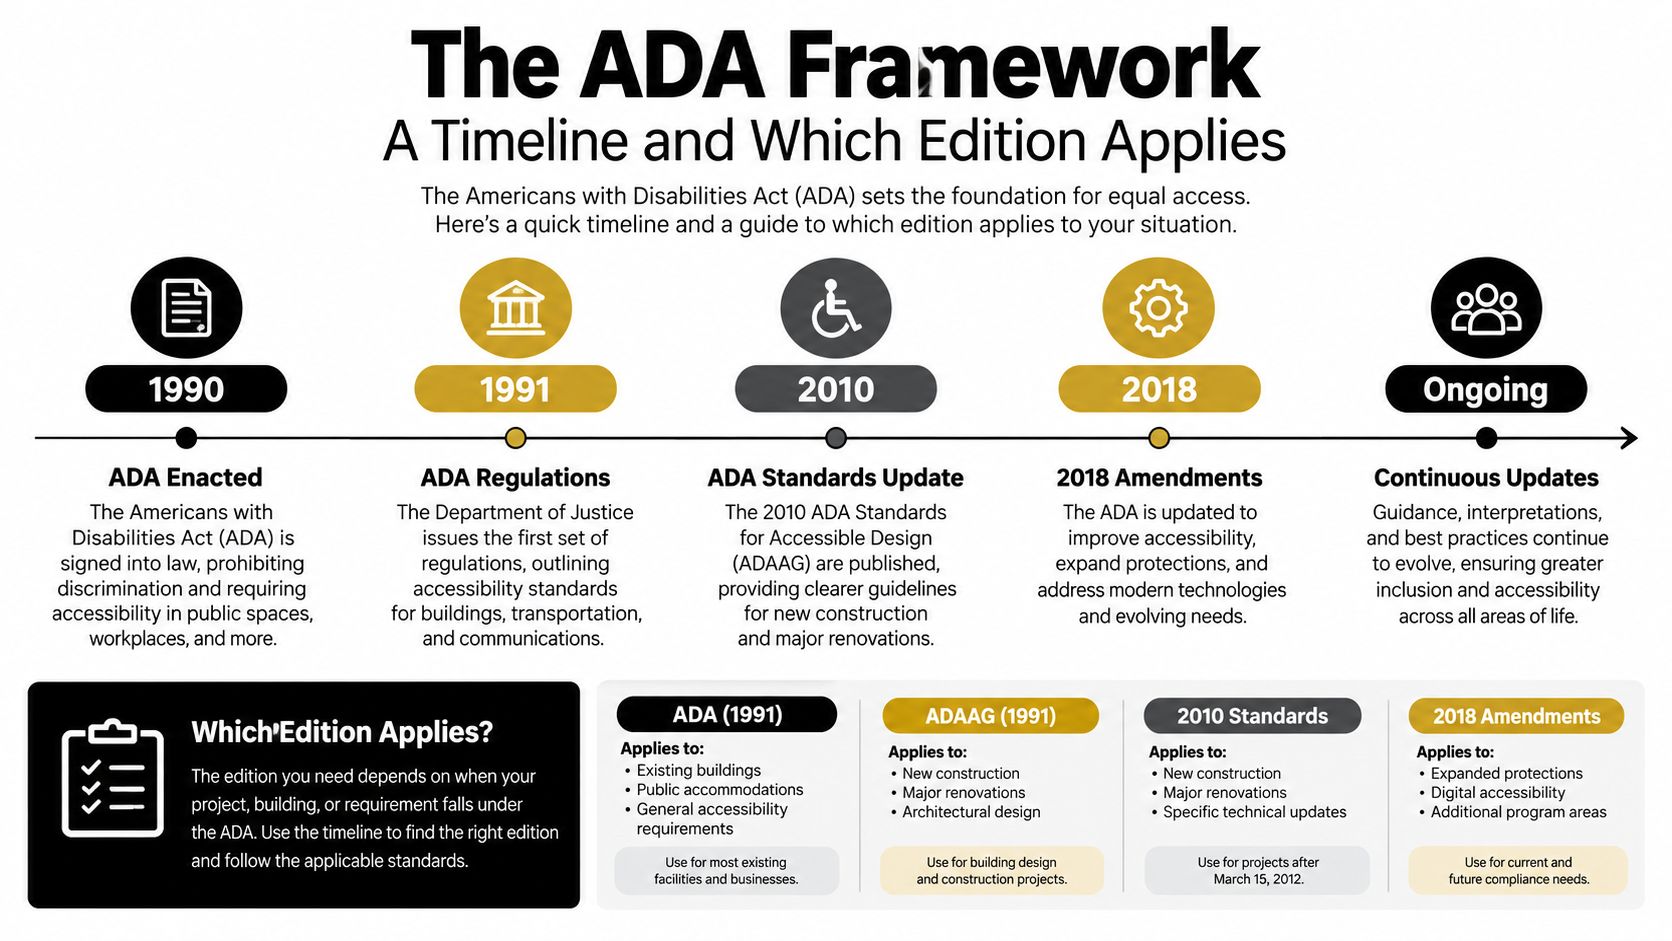
For this section, the useful question is not the adoption history. The useful question is which standard governs the scope in front of you. On most current jobs, the 2010 ADA Standards are the working baseline for new construction. Alteration work takes more sorting out, especially in older Florida buildings where one stair, ramp, or entrance has been modified in phases and the rest has not.
That distinction matters because handrails are tied to route conditions, not just to a metal detail. A newly built stair that is part of required circulation will be reviewed differently from an existing stair being altered in a limited scope. The same goes for ramps and landings. Before a rail goes to fabrication, the team should identify what is on the accessible route, what is part of egress review, and what existing conditions are staying in place. The ADA design standards history and current requirements page is still the cleanest federal reference for how the standards are applied.
In Florida, I do not treat federal ADA and the Florida Building Code as separate tracks. Inspectors rarely do either. The better approach is to map the rail to the actual inspection sequence. Start at the approach, confirm whether the element is a handrail, a guard, or both, then verify the route, the elevation change, the landings, and the mounting conditions. That is where plan review comments usually start.
Keep the paperwork aligned
Before release, the project file should identify:
- Standard edition: Record whether the scope is new construction or an alteration and why that classification was used.
- Route status: Mark the accessible route, stairs, ramps, landings, and any stair that will be reviewed as part of egress.
- Fabrication basis: Show height, profile, clearance, extensions, returns, and attachment points.
- Inspection path: Identify the local building department and any added review by an owner, HOA, or facility manager.
That record keeps the field crew, fabricator, and inspector working from the same assumptions.
Handrail Height, Grip, and Clearance Specifications
Inspectors fail a lot of railings for one simple reason. The crew measured the wrong part. For ADA work, the height is taken at the gripping surface, not at a decorative cap, not at the top of a guard frame, and not at whatever profile sits highest after fabrication. Keep the top of the gripping surface 34 to 38 inches above the walking surface, stair nosing, or ramp surface, consistent with the 2010 ADA Standards. That distinction matters because a rail can look right from ten feet away and still miss on inspection.
Measure the profile before installation
Grip comes next. A circular handrail must have an outside diameter between 1.25 and 2 inches. A noncircular gripping surface must have a perimeter between 4 and 6.25 inches, and its maximum cross-section dimension cannot exceed 2.25 inches, as outlined in the ADA handrail guidance on graspable shapes.
I check that profile before brackets are welded on. A caliper, product sheet, or shop drawing usually settles it fast. Square tube with a wide cap, bulky composite wraps, and ornamental profiles are common misses because they read like a guard cap, not a handrail a person can close a hand around. The gripping surface also needs rounded edges and a finish free of sharp, abrasive, or snagging points.
Bracket placement trips up good shops. The underside can be obstructed along no more than 20 percent of the rail length. The top and both sides still need to stay open enough for a continuous grasp and slide, so bracket style has to be chosen with the profile, not after.
Check the wall relationship
Wall clearance is a separate inspection step. Beside a wall or other solid surface, the rail needs a 1.5-inch minimum clearance for fingers and knuckles. Florida's accessibility materials also reinforce the need for rounded, graspable sections in the field, and they are worth checking alongside federal rules, especially on local reviews, see the Florida Building Code accessibility materials.
Measure from the nearest wall face to the closest part of the gripping surface. Then look at the bracket from the side. A bracket mounted under the rail can still intrude into the grip zone.
For shop-built rails, this ADA handrail diameter and graspability considerations reference is a useful check before metal gets cut.
Handrails Versus Guards and When Both Are Required
A handrail helps a person maintain balance along stairs or a ramp. A guard protects people from falling over an edge. The two systems can be combined into one assembly, but they perform different jobs and must be evaluated separately.
A low curb beside a ramp may not present a significant fall hazard. The ramp can still require a handrail based on its rise and geometry. A raised ramp beside an open drop-off usually needs a graspable handrail plus edge protection such as a curb, barrier, or extended surface. A stair edge requires handrails where the applicable provisions trigger them, but a guard isn't automatically required just because stairs have an exposed side.
Three field scenarios
- Low curb: The route has no meaningful fall hazard. The design may need a handrail for user support, while edge protection may not be necessary.
- Raised ramp: The route has an open side or drop-off. The handrail supports movement, and a guard or other edge-protection detail prevents a fall.
- Stair edge: The stair has a required handrail for grasping and balance. A guard depends on the edge condition and applicable building-code requirements.
The U.S. Access Board accessibility guidance identifies edge protection for ramp or landing drop-offs and explains why a ramp's handrail and edge conditions must be coordinated.
An integrated guard-and-handrail assembly isn't automatically compliant because the guard is tall or sturdy. The gripping surface still needs the proper height, shape, continuity, clearance, and safe terminations. A decorative guard cap often fails as a handrail because it's too wide, too angular, or interrupted by posts.
Ramp Geometry That Triggers the Handrail Rule
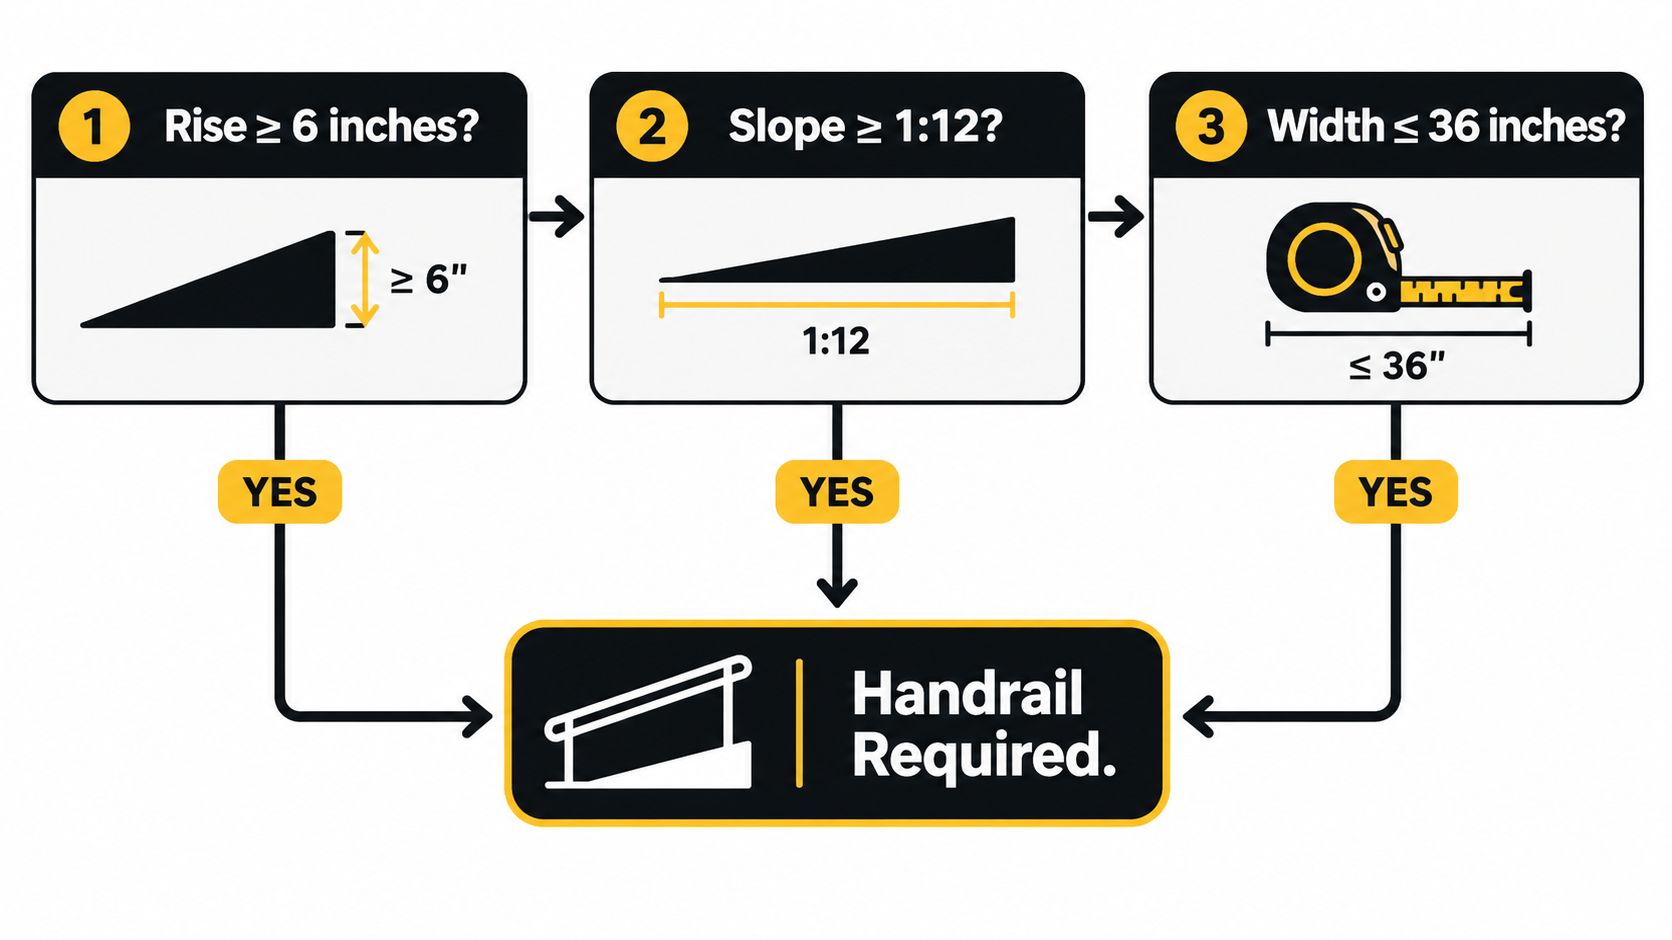
On site, this is usually the first cutoff I check. Once a ramp run rises more than 6 inches, handrails are required. At 6 inches or less, they generally are not. That sounds simple, but crews still get tripped up because they start laying out posts before they confirm rise, run length, landing size, and clear width together.
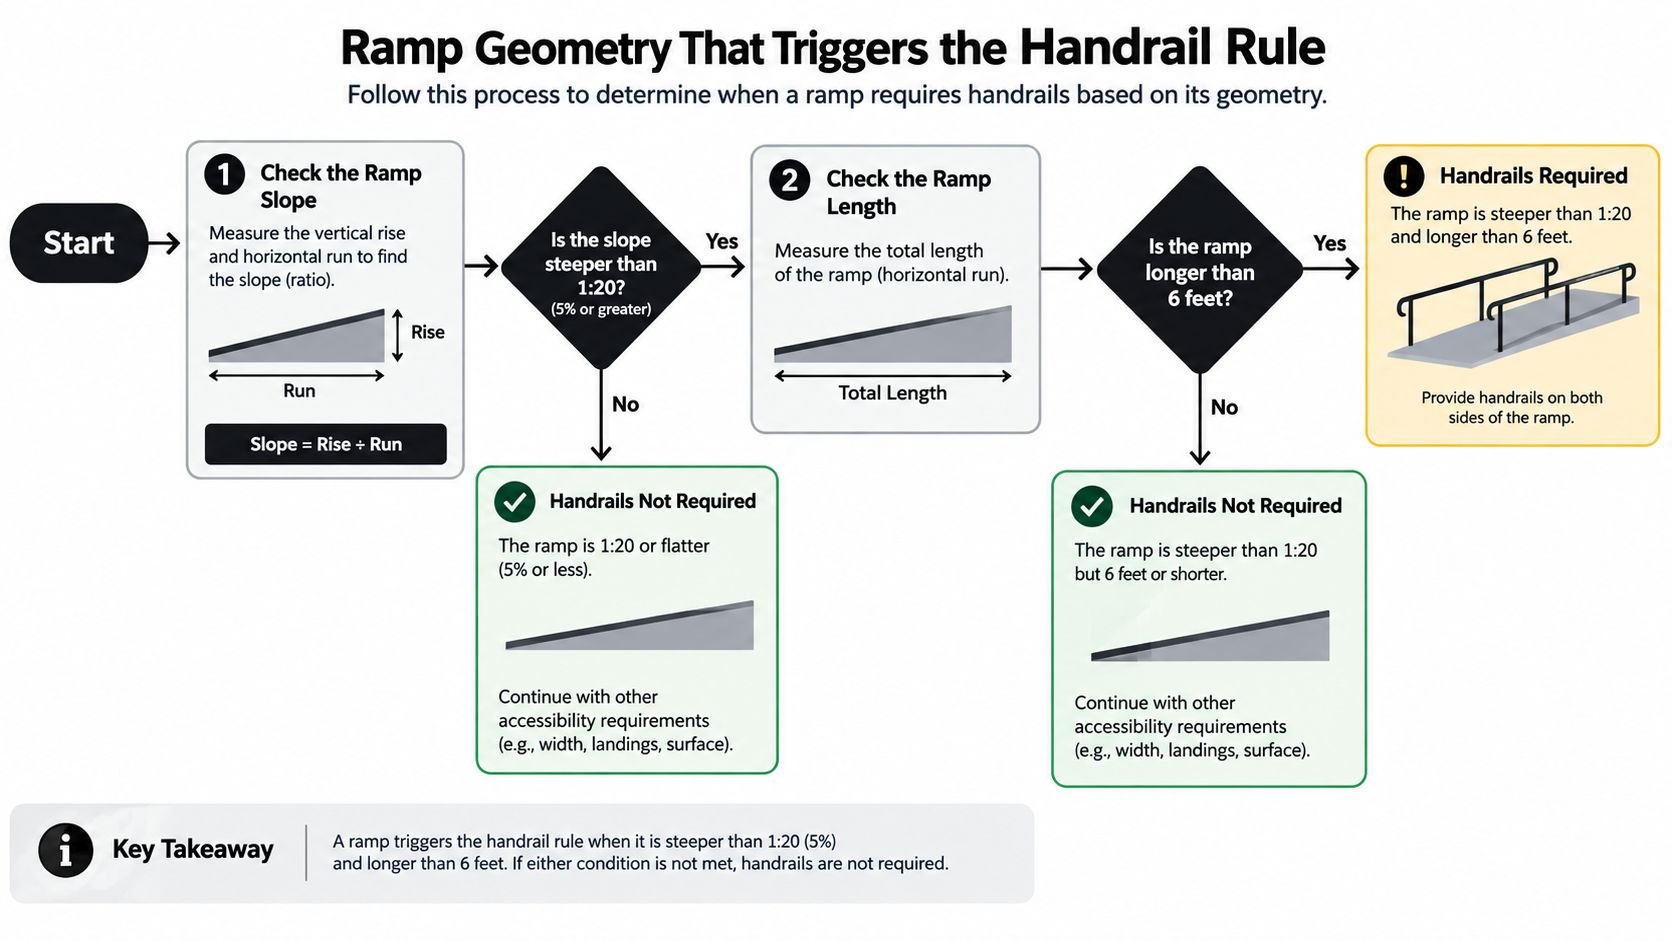
I inspect ramps in the same sequence we fabricate for them. Measure the vertical rise first, from finished lower surface to finished upper surface. Then check the running slope. A ramp can be long enough to look right and still miss the 1:12 limit once the finished surfaces are in place.
After that, check the usable width. Where handrails are required, the clear width between handrails must stay at least 36 inches. Combined assemblies cause trouble. A guard frame, bracket, or post layout can satisfy the shop drawing and still pinch the accessible route in the field.
Landings come next. The top and bottom need level landings, and a change in direction needs an intermediate landing with at least 60 by 60 inches of clear space. In Florida, coastal jobs often go sideways here. Tile buildup, slope corrections, and door thresholds eat space fast, especially on retrofit entries.
Then place the handrail geometry inside that footprint. Set the gripping surface where it belongs, and make sure the rail can extend and return without crossing into the landing, door swing, or path of travel. Handrails are one check. Guards and edge protection are separate checks, even when they share the same assembly.
For a contractor-focused walkthrough of these field measurements, see ADA handrail requirements for ramps.
Continuity and Extension Rules at Top and Bottom
A rail can look complete from a distance and still fail at its ends. Handrails must continue along the full length of each stair flight or ramp run, including the inside handrail through switchback or dogleg configurations. The 2010 ADA Standards guidance addresses continuity, extensions, and safe returns.
Ramp handrails generally extend horizontally at least 12 inches beyond the top and bottom of the run. Each extension must return to a wall, guard, landing surface, post, or adjacent handrail rather than ending with an exposed projecting tip.
Stairs use a different extension path
At stairs, the top extension continues horizontally at least one tread depth beyond the last riser nosing. The bottom extension continues along the slope for at least one tread depth beyond the last riser. The transition then needs a safe return that doesn't create a projection hazard.
Here, drawings often mislead installers. A line drawn as a short horizontal cap may not provide the required extension once the stair nosing, landing, and adjacent wall are measured in the field.
Field-check the ends
- Top return: Confirm the extension has the required horizontal length and returns safely.
- Bottom return: Follow the sloped extension beyond the last riser before returning it.
- Wall conflict: Check that the return doesn't strike a door, trim, light switch, or narrow walkway.
- Projection hazard: Walk the route from both directions and look for exposed tips or sharp corners.
- Inside continuity: Inspect switchbacks from the inside corner, where a broken rail is easy to miss.
A clean return is a safety detail, not a cosmetic finish. It gives the user support through the transition and keeps the rail from becoming a snag point.
Best Materials for Coastal Florida Railing Installations
Federal dimensions determine whether a handrail can be used safely. The Florida coast determines whether the assembly remains sound, comfortable, and presentable after repeated exposure to salt air, moisture, rain, pool chemicals, and strong sunlight.
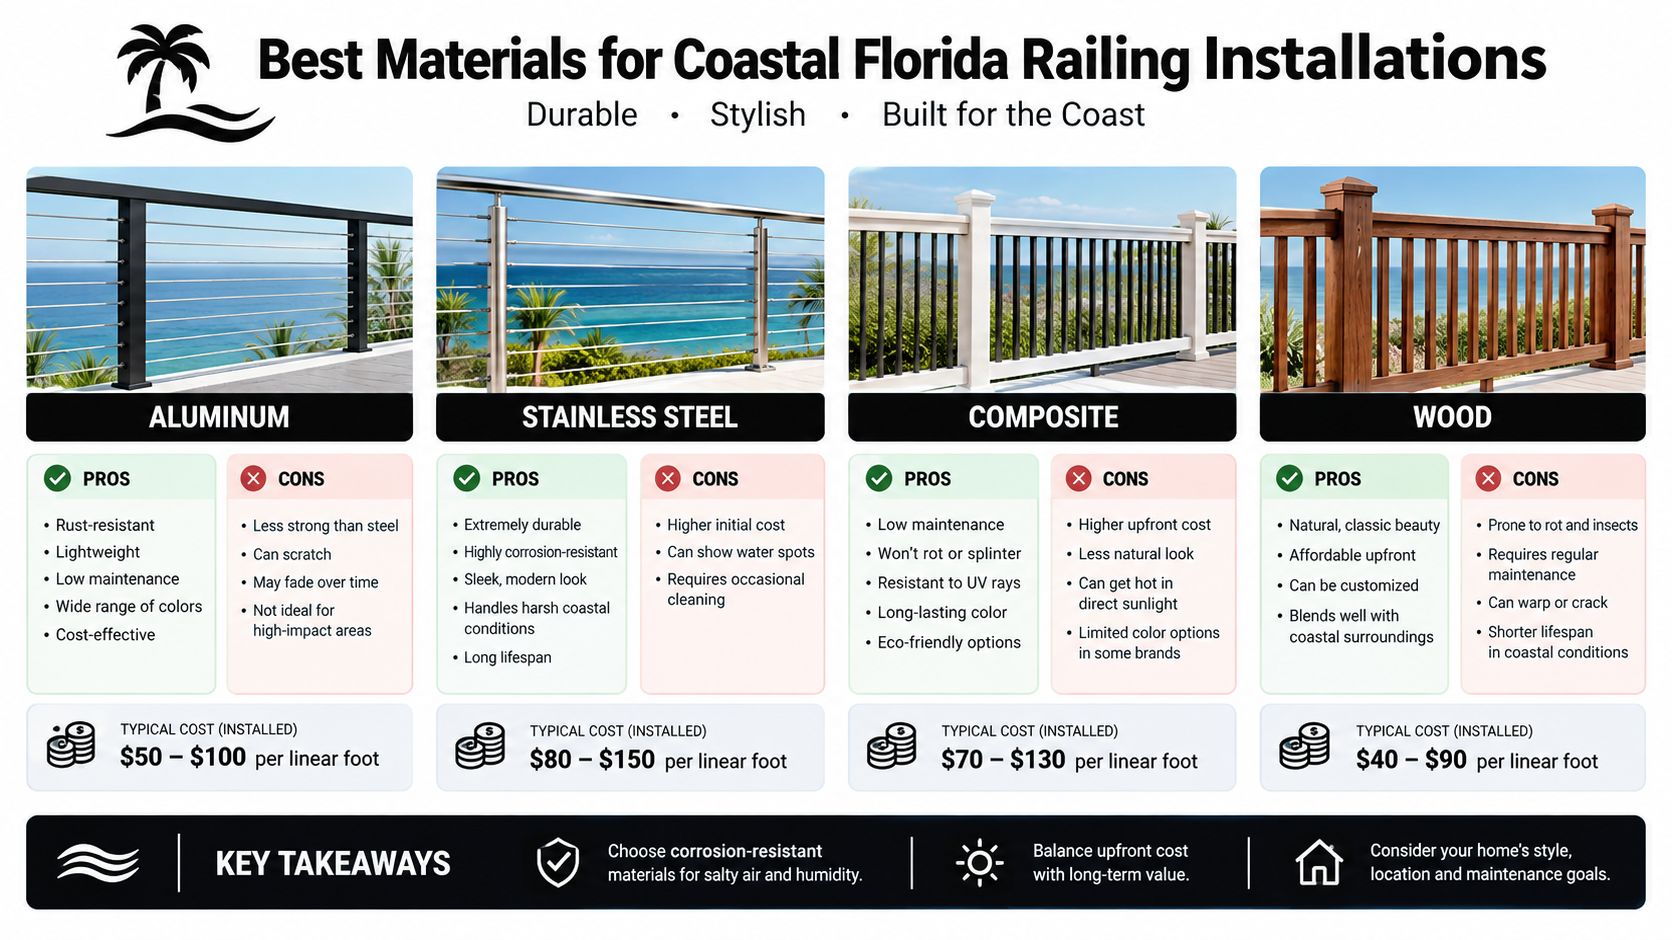
Compare the practical choices
Powder-coated aluminum is often a sensible choice for Treasure Coast ramps, pool decks, and HOA common areas because it's light, corrosion-resistant, and available in consistent graspable profiles. The finish still needs proper preparation and maintenance, especially near direct salt exposure. Aluminum fasteners and compatible isolation details help reduce galvanic corrosion where dissimilar metals meet.
Stainless steel offers a durable, clean appearance for high-visibility entrances, hospitality sites, and coastal access points. Grade selection matters. 304 stainless steel can work in many exterior environments, while 316 stainless steel is generally the more defensible choice where salt exposure is more aggressive. The entire assembly should be coordinated, including anchors, washers, brackets, and weld finishing.
Hot-dip galvanized steel provides a solid structural option where strength and impact resistance matter. It's heavier than aluminum and can require more attention at cut edges, field welds, drainage points, and finish transitions. A painted or powder-coated galvanized assembly also needs a compatible preparation process.
Avoid incompatible combinations
A strong rail can deteriorate early when the hardware package is mismatched. Direct contact between dissimilar metals, trapped water at post bases, unsealed cut ends, and ordinary fasteners in a salt-air location are recurring trouble spots.
For a beachside ramp, a pool-deck handrail, and an HOA clubhouse stair, the material decision should consider exposure, substrate, expected traffic, finish repairs, and warranty terms. A cheaper rail that needs frequent corrosion correction may cost more operationally than a properly specified system.
Federal ADA, Florida Building Code, and Local Permits
A rail can match the 2010 ADA Standards on paper and still fail the job if the permit set, state code references, or inspection sequence are off. In Florida, I treat approval as three separate checks that have to line up. Federal ADA governs accessible use. The Florida Building Code adds state construction and accessibility requirements. The local building department decides what gets permitted, what details must appear on the drawings, and what the inspector expects to see in the field.
That distinction matters because handrails and guards do not get reviewed the same way every time. A stair rail detail may satisfy accessibility dimensions yet still trigger comments on structural attachment, guard loading, pool barrier coordination, or product approvals, depending on the site and the jurisdiction.
The cleanest path is to match the review process to the way inspectors walk the project. Start with the route. Confirm whether the rail is serving a ramp, a stair, a walking surface edge, or more than one of those conditions. Then check the submitted detail against field conditions before fabrication release. I do not order final cuts until wall offsets, returns, landing edges, and post locations match the approved layout.
Local permitting can also reach work owners assume is minor. Martin County, for example, states that a permit is required to construct a fence, which is a useful reminder that exterior railing work may fall into a regulated scope depending on how the assembly is classified and where it is installed.
If the permit file and the installed rail do not match, final approval slows down fast.
New Construction Versus Alterations and Retrofits
New construction gives the design team room to reserve the ramp footprint, landing dimensions, door clearances, and rail returns before concrete and finishes are committed. Alterations rarely provide that luxury. Existing walls, stairs, drainage, landscaping, utilities, and door swings can force a careful decision about what must be changed and what route is required.
The Access Board stairway guidance explains an important distinction: stairs aren't part of an accessible route, but stairs that form part of a required means of egress still have to comply with applicable handrail and stair provisions. In an alteration, an existing stair between levels connected by an accessible route may not itself have to become the accessible route. However, when those stairs are altered, the handrails still need to comply.
Measure before promising a scope
A retrofit estimate should record:
- Rise and run: Measure the actual stair or ramp geometry, not only the plan dimensions.
- Landing size: Check top, bottom, and direction-change landings.
- Clear route: Measure between handrails where rails are provided.
- Returns: Identify walls, guards, posts, floor surfaces, and open ends available for safe terminations.
- Conflicts: Mark doors, walkways, lighting, landscaping, drainage, and existing equipment.
That field record helps distinguish a handrail replacement from a larger accessibility modification. It also prevents a contractor from promising a full ramp conversion when the project may instead call for compliant handrails on an existing stair or route.
Inspection Checkpoints That Catch Failed Railings
Inspectors rarely fail a railing for one measurement alone. In the field, the misses usually show up as a sequence problem: the hand can start on the rail, then lose contact at a bracket, hit an oversized top cap, run into a bad return at the landing, or meet a guard that protects the edge but does not function as a handrail.
That is why I inspect these jobs in the same order a user experiences them.
Start at the bottom landing and walk in. Look for the problems that get missed before anyone pulls out a tape. A rail end that projects into the path, a post set where a chair needs turning room, or a return that crowds the approach can draw comments fast. On stairs, I check from the nosing line. On ramps, I check from the actual travel surface and follow the route through every landing and direction change.
Then measure the grip itself. Height matters, but so does shape, continuity, and clearance around the hand. I use a tape for gripping height and a caliper for profile when the rail looks questionable. Product cut sheets help, but field conditions decide the inspection. A bracket placed in the wrong spot, a weld hump at a splice, or a transition into a decorative guard cap can turn a compliant product into a failed installation.
The distinction between handrails and guards matters here. A ramp with railing can pass one function and fail the other. I see this on custom aluminum work in Florida all the time. The open side is protected, but the top member is too wide to grasp, or the graspable member is set right while the edge protection leaves a gap at the landing.
Coastal jobs need one more check. Corrosion at fasteners, tea staining on stainless, and swollen coatings on aluminum can reduce clearance, roughen the grip, or loosen connections long before the rail looks obviously damaged. Near the water, hardware choice and finish condition affect inspections just as much as layout.
One detail gets overlooked often: underside bracket interference. Obstructions can occupy no more than 20 percent of the underside length. A rail may read clean from above and still fail once you run your hand along the full length.
Quick Reference for ADA Railing Details
Keep this sheet in the truck or on the cart. It separates handrail checks from guard-related checks and follows the same order many inspectors use in the field, surface first, then grip, then continuity, then terminations.
| Detail | Requirement | Field Check |
|---|---|---|
| Gripping height | 34 to 38 inches | Measure to the top of the gripping surface from the finished walking surface, stair nosing, or ramp run. |
| Circular grip | 1.25 to 2 inches outside diameter | Check the installed profile with a caliper, not the catalog sheet alone. |
| Noncircular grip | 4 to 6.25 inches perimeter, maximum 2.25-inch cross-section | Measure the full perimeter and the widest cross-section at the installed rail. |
| Wall clearance | 1.5 inches minimum under Florida accessibility guidance | Measure from the wall to the nearest point of the graspable surface, including any coating buildup. |
| Ramp rise trigger | Greater than 6 inches generally requires handrails | Verify total rise in the field. Small grading changes at landings can change the answer. |
| Ramp slope | Maximum 1:12 running slope | Compare rise to horizontal run and check the actual built condition, not only the drawing. |
| Ramp clear width | At least 36 inches between handrails where provided | Measure clear width between installed handrails at the tightest point. |
| Intermediate landing | At least 60 by 60 inches at direction changes | Measure usable clear space. Posts, returns, and edge elements cannot eat into it. |
| Ramp extensions | At least 12 inches horizontally beyond top and bottom | Measure each extension and confirm it returns properly. |
| Stair extensions | One tread depth at top horizontally and at bottom along the slope | Measure from the relevant riser and confirm the extension stays continuous. |
| Underside obstruction | No more than 20 percent of the length | Review bracket spacing and run your hand under the rail where brackets interrupt grip. |
| Terminations | Return to wall, guard, post, landing, or adjacent handrail | Check that no exposed end projects into the path. |
Use the table with a tape, level, and caliper. I also mark up shop drawings as I inspect because integrated systems can pass as guards and still fail as handrails. That distinction causes a lot of missed corrections.
For coastal Florida work, add one more pass before sign-off. Check fasteners, weld cleanup, stainless tea staining, and swollen powder coat at brackets and returns. Corrosion and finish buildup can steal clearance and roughen the grip even when the layout was right on install day.
Common Questions About ADA Railing Details
Does a residential ADA retrofit always need a permit?
Not every residential project follows the same permit path. The local building department determines whether the proposed work requires a permit, and Martin County states that a permit is required to construct a fence. The project should be reviewed locally before fabrication or demolition begins.
How close can a handrail sit to a wall?
Florida accessibility guidance identifies a minimum 1.5-inch side-wall clearance. The installer should measure the actual gripping surface, not only the bracket or post.
When does a guard join the handrail?
A guard is considered when the ramp, landing, stair, or walkway has an applicable fall hazard. The handrail still has to meet its own grip, height, continuity, and return requirements, even when it's integrated with the guard.
How do federal ADA standards interact with the Florida Building Code?
They should be coordinated on the same project. Federal standards govern accessibility obligations, while Florida and local requirements govern additional construction, permitting, and inspection conditions.
AlliedFenceAndGate.com™ fabricates and installs ADA-compliant hand railings, wheelchair ramp railings, stair handrails, guard rails, and pool-deck safety railings across Florida's Treasure Coast and northern Palm Beach County. Property owners and contractors can review project options and request help with measurements, permitting, fabrication, and inspection coordination by visiting AlliedFenceAndGate.com™.
Related Fencing Services
Need a fence or gate on the Treasure Coast?
Licensed, insured, and bonded. Free estimates across Martin, St. Lucie, Indian River & Palm Beach counties.
Call (772) 530-3127