Wood Privacy Fence Installation: How to Build It in Florida

The fence came with the house, and it's starting to lean. You noticed it after the last round of afternoon storms: the gate post at the driveway has a tilt to it, and three panels along the back line move when you push on them. Up close, the bottom six inches of the pickets gouge with a thumbnail, and there's a dark line on the rails where water sits and never quite leaves.
New boards won't fix that fence, and neither will a fancier species of wood. What fails first on a wood privacy fence in Florida is the place where wood meets soil. The second is a solid panel standing up to wind with nothing but a buried 4x4 holding it. Get those two details right and the structure runs 15 to 20 years. Get them wrong and it starts checking, twisting and rotting inside five.
Field rule: the boards are the visible part of the fence, but the posts and the ground line decide how long you keep it.
The order matters: material, approvals, layout, posts, panels, then a maintenance schedule you'll follow.
Table of Contents
- Compare Wood Fence Options Before You Buy
- Check Permits, HOA Rules and Wind Exposure First
- Survey the Fence Line and Call 811 Before Digging
- Set Posts for Ground Contact and Florida Wind
- How to Build the Fence Panels Step by Step
- Florida Moisture and Termite Mistakes to Avoid
- Choose Your Material and Schedule the Install
Compare Wood Fence Options Before You Buy
Most homeowners narrow to three choices: cedar board-on-board, cedar shadowbox, and pressure-treated pine board-on-board. All three are wood privacy fence installation with vertical pickets on horizontal rails, and all three live or die on the same posts and the same ground-line detailing. What changes is how the panel goes together and how the lumber handles humidity.
Board-on-board uses two layers of pickets, one on each face, offset so each board covers the gap behind it. You get near-total privacy and a fence that looks finished from the street and the yard. Shadowbox alternates boards between the two faces for a bay-window effect: the same clean look in and out, with small gaps that let air and light through. Those gaps cost a little privacy and buy a little wind relief.
| Option | Typical height | Typical lifespan | Maintenance | Best fit |
|---|---|---|---|---|
| Cedar board-on-board | 6 ft (4-8 ft range) | 15-20 years | Seal every 2-3 years | Humid, wet or coastal yards |
| Cedar shadowbox | 6 ft (4-8 ft range) | 15-20 years | Seal every 2-3 years | Yards that need a finished look on both sides |
| Pressure-treated pine board-on-board | 6 ft (4-8 ft range) | 10-20 years | Stain or seal every 1-2 years | Tight budgets on well-drained lots |
Cedar earns its price in humid yards because the wood resists decay and insects without chemical treatment, and it holds a sealer well. It also costs more per foot and wants a fresh coat every couple of years. Pressure-treated pine is the budget route: the boards are chemically protected, heavier out of the stack, and more likely to check and twist as they dry. Staining or sealing once the wood has dried out, usually a few weeks after install, is what keeps pine flat and dark instead of silver and cupped.
Choose cedar when the yard stays wet, sits on a canal, or takes salt spray. Choose pressure-treated pine when budget leads and the lot drains well, then spend the savings on the posts.
The full cost and service-life comparison sits in this breakdown of pressure-treated pine versus cedar fence if the two are still tied. Once a material and style are picked, the next question isn't aesthetic anymore. It's whether the height and the placement are allowed.
Check Permits, HOA Rules and Wind Exposure First
Most wood fence projects that stall do not stall at the lumber yard. They stall in an approvals queue, because the paperwork does not match the plot plan, the HOA guidelines, or both.
What the HOA reviews first
Architectural review typically controls maximum height, allowed materials, color and finish, and setbacks from the property line and neighboring structures. Some boards also restrict solid panels on corner lots so sight lines stay open, and a few require a planted buffer behind the fence. A complete submittal includes the plot plan, a drawing or photo of the style, the material, the height, and the color. Send one missing page, and the packet goes to the back of the review queue.
What the building department reviews
A permit is not only about where the property line sits. Review can address height, location, zoning, and wind load. A solid privacy fence behaves like a wind-catching sail, so post spacing, embedment depth, concrete detail, fasteners, gate hardware, and even panel permeability can matter more than the species of wood.
Screen the site for wind and for moisture at the ground line before anyone prices materials. Those two conditions, not the board species, are what set how long the fence lasts. A long open exposure loads the posts. A yard that stays wet at the bottom of the boards loads the wood itself.
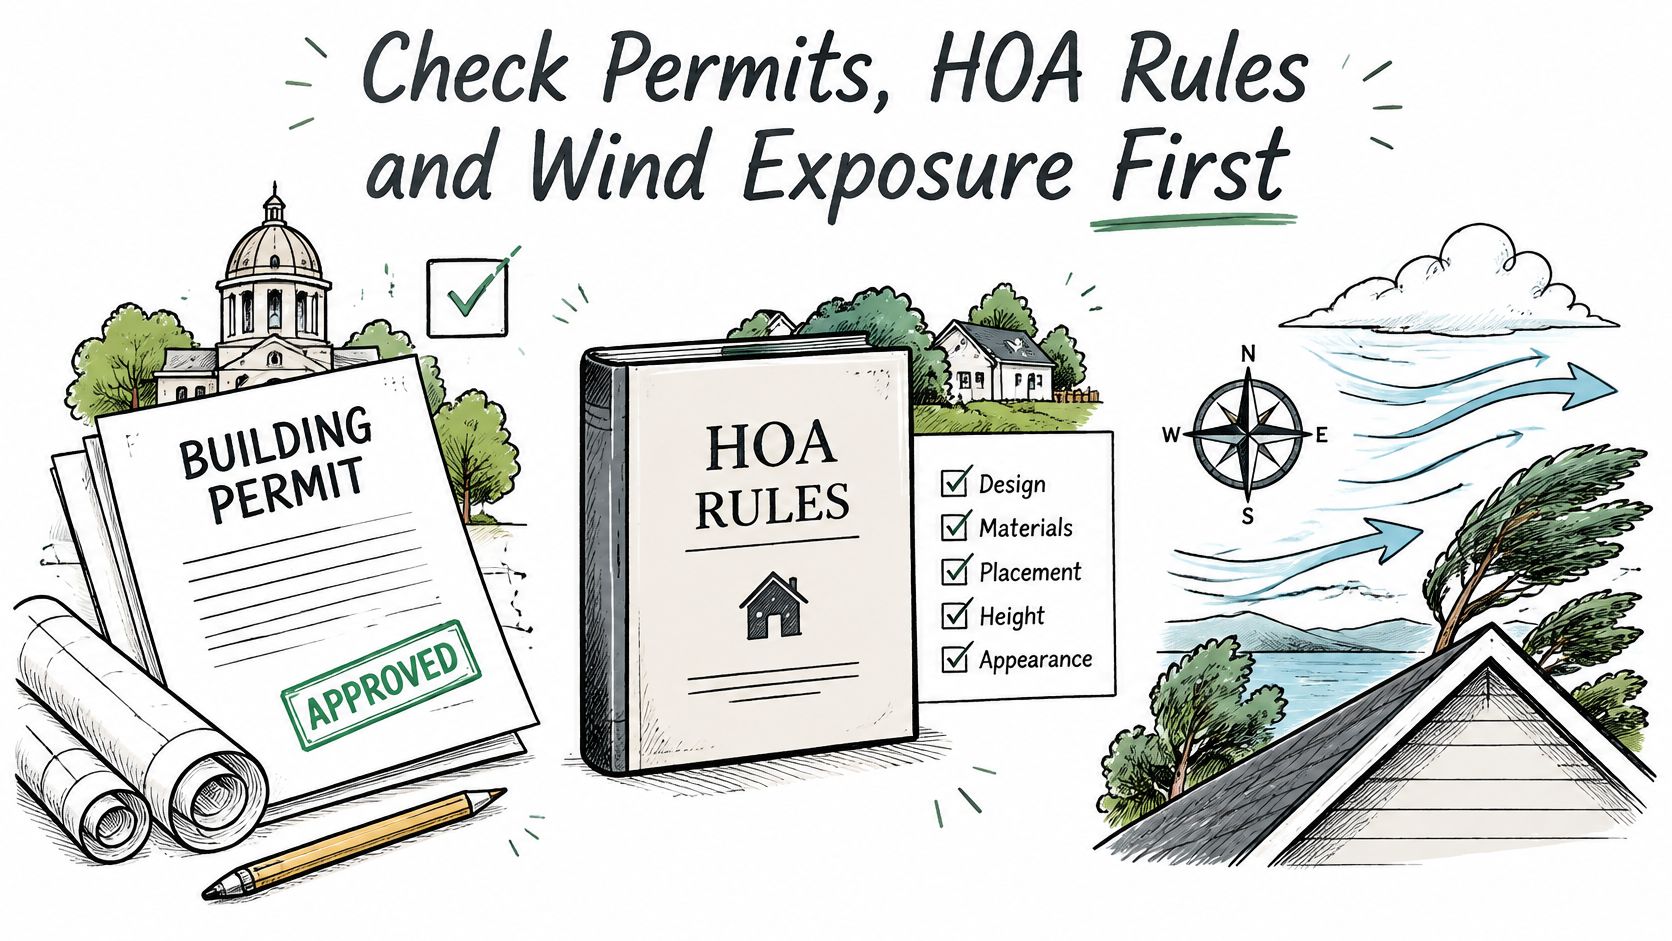
Florida wind-load requirements depend on how far the property sits from open water. Coastal counties feel the stricter exposure first, but inland properties with a long open fetch across a lake or a preserve can qualify too. Local ordinances and building-code criteria can affect wind-load compliance, as the Florida Building Commission annual report sets out.
Screening the site before applying
- Jurisdiction: confirm whether the county or the municipality issues the permit, and whether an easement runs along the fence line.
- Distance from open water: measure it, because proximity is what can trigger the stricter exposure category.
- Height and continuity: a long unbroken run of 6-foot privacy panels loads differently than a fence broken by gates and returns.
- Corner and gate locations: both change post spacing, and gates carry loads the line panels never see.
- Soil and drainage at the ground line: sandy fill, muck, or a yard that ponds after rain changes the footing detail and how long the bottoms of the boards stay wet.
- Wind-borne debris exposure: determines hardware ratings and whether an engineered detail is required.
Board style, cap rail profile, and stain color are preferences. Post embedment, fastener grade, and gate framing are structural. Mixing the two in one conversation is how a fence passes the aesthetic review and fails the wind.
Boundary rules vary by county, and this guide to fence laws in Florida covers who owns and maintains a shared line. Have three things ready before the application goes in: the HOA guidelines, a plot plan showing property lines, setbacks, and gate swing, and site notes on water, soil, and wind exposure.
Survey the Fence Line and Call 811 Before Digging
Nothing gets dug until the line is staked and the utilities are marked. Staking is where the fence gets designed, because a gate that lands in the wrong place shifts the whole panel layout.
- Stake the ends and corners. Drive a stake at both ends of the run and at every corner, then pull a string line between them. Mark each gate opening with two stakes, one for each hinge or latch post.
- Flag the post centers. Measure along the string at the planned spacing and flag every post location. If a wider gate opening pushes a post off the even spacing, adjust before the flags are final.
- Call 811. In Florida that's Sunshine 811, and the request needs to go in at least two full business days before digging so the marks are down. Marks stay valid for a limited window, so schedule the call close to the dig date and not weeks ahead of it.
- Check the private lines the free locate does not cover. Irrigation, septic and drainfield, pool plumbing and equipment pads, yard lighting and downspout drains are all on you. Those usually need a private locator.
- Confirm any easement along the property edge. A fence inside a utility easement can be pulled out or relocated at the owner's cost when the utility needs access, permit or no permit.
An unmarked strike turns a two-day job into a repair bill, a utility crew on your lawn, and a change order that wasn't in the budget. The flags also tell you where not to put a gate post, which is often worth more than the call itself.
What the 811 call does not cover
The free locate protects the utility-owned lines. Anything installed after the meter, plus anything you added yourself, is invisible to it. Say a previous owner ran a 1-inch irrigation main along the back fence to feed a garden bed: the locator won't mark it, and a spade through it means a flooded trench and a weekend of repairs.
The color code on the flags and paint matters when you read the marks, and this guide to 811 utility marking colors explains what each one means. Finish with a staked line, a written list of marked and private utilities, and an approved path for every post.
Set Posts for Ground Contact and Florida Wind
Posts, not panels, set the service life. The U.S. Forest Service identifies the ground line as the greatest decay hazard in wooden fences, because soil supplies continuous moisture and that zone dries slowly, according to Forest Service guidance on wood fence construction. The same guidance calls for preservative-treated lumber approved for ground contact wherever posts touch soil. Above ground, naturally decay-resistant species or treated wood both work, and the joints where horizontal rails meet vertical boards are a secondary risk point because they trap water.
Why the ground line decides the lifespan
Warm, wet markets tilt the material choice. The Forest Service's Wood Handbook notes that pressure-treated species often outperform naturally durable species in warm, wet climates, while the performance gap narrows in dry ones. A post rated for ground contact, a hole that drains, and a cut end that gets sealed before it's buried are the three details that do the most work.
| Fence height | Post spacing | Hole depth | Hole diameter |
|---|---|---|---|
| 4 ft | 8 ft | 24-30 in | 10-12 in |
| 6 ft | 8 ft | 30-36 in | 10-12 in |
| 8 ft | 6-8 ft | 36-42 in | 12 in |
Setting the posts
- Dig to the table depth and widen the bottom slightly so the concrete forms a bell that resists uplift. A straight-sided cylinder of concrete grips poorly in sandy soil.
- Set the post plumb and brace it on two sides. Braces stay on until the concrete cures, not until it looks firm.
- Pour concrete to just below grade and slope the top away from the post. A crown that sheds water outward keeps the end grain dry. A dished footing that cups water against the post is worse than no concrete at all.
- Wait at least 24 hours before hanging rails, and longer in cool weather. Green concrete plus rail load equals a post out of plumb that never comes back.
A concrete collar does not correct poor drainage. If the hole fills with water, the fix is a gravel base and a crowned, sloped footing, not more concrete.
Wind changes the numbers
On an 8-foot fence, tighter spacing and deeper holes matter more than the extra height suggests, and exposed sites need hardware rated for the load instead of the builder-grade hinges that come in a box. Gate posts take the heaviest hit and should be oversized and set deeper than the line posts.
The table holds starting values. A county wind-load requirement or a soil test overrides it, and in coastal Martin and Palm Beach County properties the county requirement usually wins. Before framing, confirm three things: posts plumb, braces still on, and every footing draining away from the wood.
How to Build the Fence Panels Step by Step
On a cedar privacy fence a couple of years old, the bottom rail tells you whether the install was right. If that rail sits in splash and mulch, the boards above it do not matter. Species is the smaller decision. Ground clearance, sealed end grain, and how the face takes Florida wind set the lifespan. I keep the bottom rail high enough that a mower and a wet summer never reach it.
A panel is a drainage decision as much as a carpentry one. The U.S. Forest Service reports that serious decay generally occurs only when wood moisture content rises above the fiber-saturation point, averaging about 30 percent, and that decay can be prevented from starting or progressing when wood stays below 20 percent moisture content, per Forest Service research on wood decay and moisture. Dried lumber climbs back over that line through rain, condensation, and wet ground. Unsealed board ends and rail connections fail first.
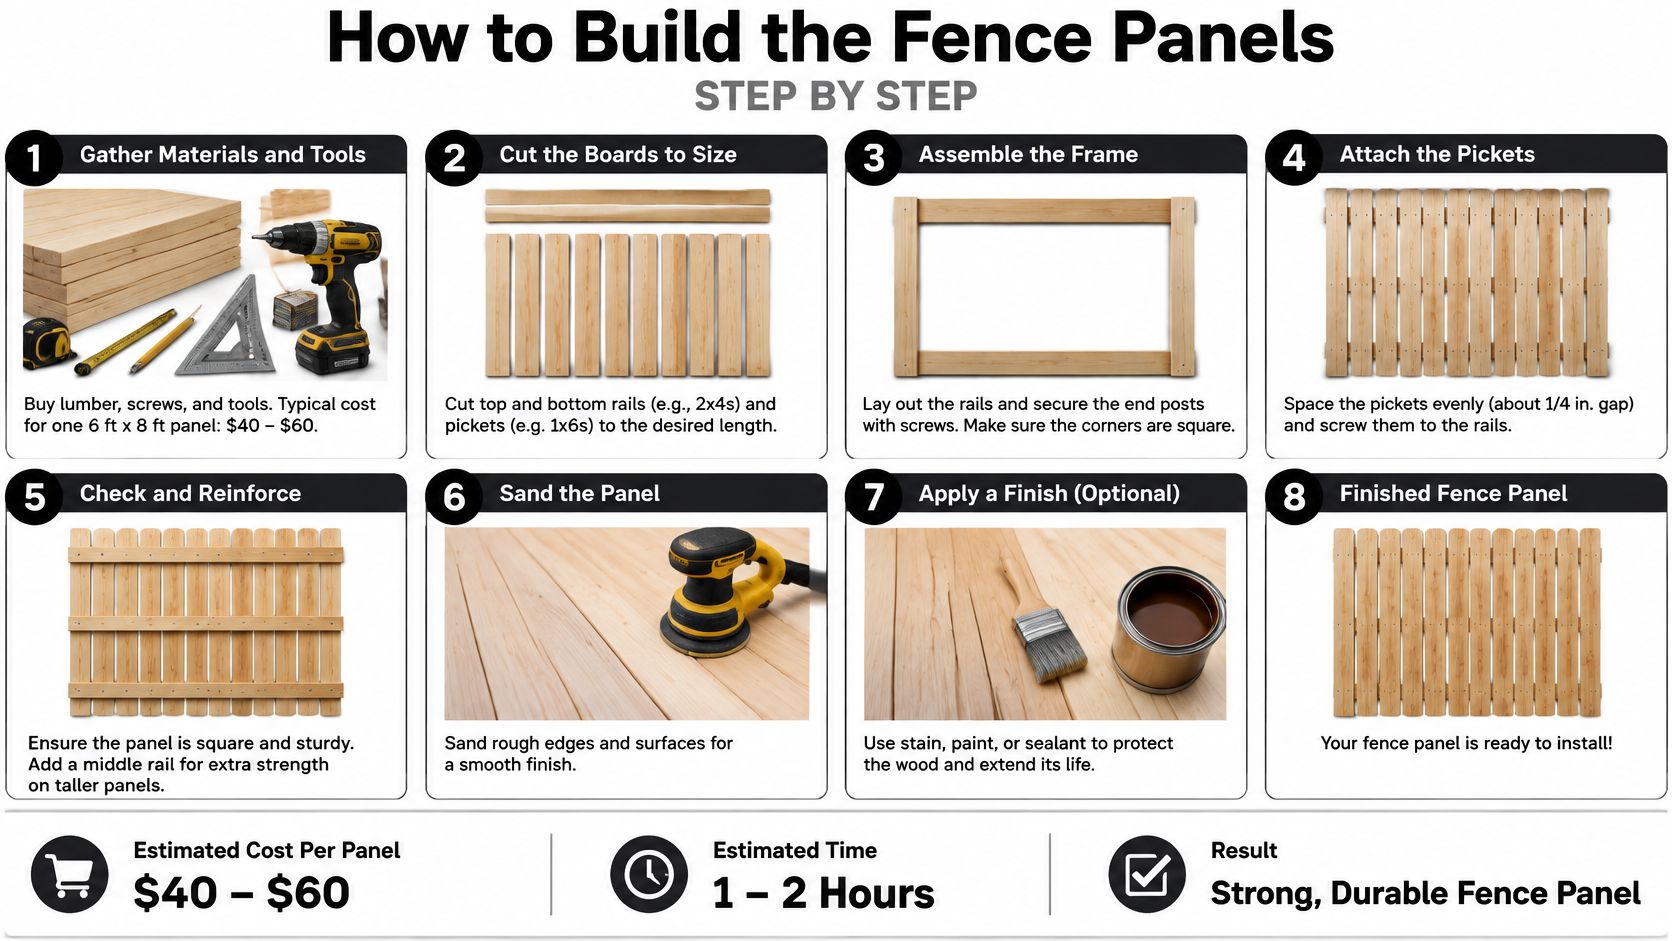
The build, step by step
- Attach the rails. Fix two horizontal rails on a 4-foot fence and three on a 6-foot or taller fence, on the inside face of the posts, with corrosion-resistant fasteners. Keep every rail end well above soil and clear of wet ground. Framing that stays in contact with grade holds moisture at the cut, and that is where decay starts. The usual slip is running the bottom rail low because it looks tidier from the kitchen window.
- Keep boards off the grade. Leave a clear gap between the bottom of the pickets and the soil so splash, mulch, and standing water never reach the end grain. Boards that touch dirt wick moisture straight up and are the first pickets to go soft. On a windy lot that gap also lets air move under the panel instead of trapping damp against the wood.
- Seal every cut, notch, and drilled hole before assembly. Most decay starts at exposed end grain. A post top or rail end sealed after installation has already taken on water. Brush preservative or end-cut sealer on the cut and let it dry before the board goes up.
- Hang the boards. For board-on-board, alternate boards on each face with a spacer so each one overlaps the seam behind it and sheds water off the face. Use stainless or hot-dip galvanized fasteners. Electro-galvanized nails bleed rust streaks down cedar within a season or two in salt air, and those streaks do not come out. A solid privacy face catches more wind than open pickets, so the fasteners and the overlap have to hold the panel as one unit.
- Check plumb and gaps every five or six boards. Run a level on the face and a spacer between pickets, then sight down the line from the end. Correcting a drift at board six costs minutes. Correcting it at board forty means pulling the run.
- Hang the gate after the line is true. Use hinges sized for the leaf width, not the light pair that came in the hardware pack. A 5-foot gate on light hinges sags within a year and drags on the ground by year three. That drag puts the bottom of the leaf back into wet soil, which undoes the clearance you just built into the panels.
- Run the final check. Water should run off the rails rather than sit on top of them. No board should touch soil. Every post top should be capped or sloped so rain does not sit on end grain.
Practical rule: if water can sit anywhere on the finished fence, it will, and it will sit there for years.
From the gate end, a square fence shows a level top line, even picket spacing, a gate that latches with two fingers, and no gap at the bottom that lets a dog out. That is the whole inspection, and you can run it yourself before the crew packs up.
Florida Moisture and Termite Mistakes to Avoid
Species selection is the smallest part of longevity, and the industry talks about it as if it were the whole story. USDA Forest Service research identifies southern Florida as habitat for dampwood termites, which attack wood with high moisture content, especially where wood sits in direct ground contact, and notes that subterranean termites can reach wood through shelter tubes even when the board reads dry, as detailed in Forest Service research on termites and wood durability. The same body of guidance is blunt that excessive water causes decay.
So the key question isn't which wood lasts longest. It's how drainage, irrigation, mulch, vegetation, end-grain exposure, post treatment, fastener corrosion and splash-back stack up over ten years on your lot. A cedar fence with a sprinkler head aimed at the gate post will lose to treated pine on a dry, graded lot every time.
Termites follow moisture, not species
Shelter tubes let subterranean termites cross a gap that a surface inspection would call dry. Dampwood termites don't bother building them, because they go straight for wet wood at the soil line. Both mean the post base is the inspection point that matters, and mulch piled against the pickets is an invitation rather than a landscaping choice.
| Moisture source | What it causes | Fix |
|---|---|---|
| Sprinkler heads aimed at posts | Constant wetting at the ground line | Move heads at least 12 in from posts |
| Mulch piled against posts | Holds water and gives termites cover | Keep mulch 6 in from posts |
| Standing water at post base | Rot at the bottom of the post | Grade soil away and set a gravel base |
The inspection that takes ten minutes
Walk the fence each spring, after any multi-day rain, and after every named storm. Look at the post bases and the gate posts first, since they carry the most load and the most water.
- Soft, spongy wood at the post base: that post is gone. Plan a replacement rather than a patch, because a post that gives under a knife will not hold a rail.
- Mud tubes on the post or along the concrete: call a pest professional. This is not a hardware-store fix.
- Rust streaks below fasteners: replace the fasteners with stainless or hot-dip galvanized before the staining spreads.
- Checking and splits at board ends: seal before the next rain gets into the crack.
Decay that has already started does not stop on its own. It stops when the water source does, and finding the water source is the whole job.
Put the resealing dates on a calendar before the first hole is dug, matched to the material rather than to how the fence looks. Waiting for visible grey wood means the surface has already taken the damage.
Choose Your Material and Schedule the Install
A canal-side yard in Stuart that stays wet at the ground line will rot pine from the bottom long before the board species matters. Florida wind does the rest. It racks loose rails and pulls fasteners the first time a hard blow off the water hits a solid privacy face. Drainage, distance from open water, and how the posts take that load set the lifespan.
A yard that stays damp, backs onto a canal, or takes salt spray wants cedar board-on-board or cedar shadowbox, because the wood's own decay resistance is doing part of the work. A well-drained inland lot where budget leads can take pressure-treated pine board-on-board, with the savings put into the posts and the gate framing, where the load lands. I recommend cedar board-on-board when ground-line moisture and wind exposure are the primary risks.
Specify stainless or hot-dip galvanized fasteners on the written quote, not "galvanized" as a word on a handshake. AlliedFenceAndGate.com™ builds with stainless or hot-dip galvanized hardware and recommends cedar board-on-board for longevity in Florida's climate. Hold a contractor to that specification.
Ask for gates, heavier gate posts, and any specialty hardware as separate line items. They carry loads the line panels never see, and folding them into a per-foot number hides the one place where cutting corners shows up first.
Once the permit is approved and the lumber is on site, a typical residential installation in Stuart takes one to three days. An engineered wind detail, a soil problem, or a locate surprise pushes that out, so build a buffer into the schedule rather than promising a same-week finish.
The packet that should exist before anyone digs:
- Material and style committed in writing, with post rating on the spec sheet.
- HOA approval in hand, not verbal.
- Permit submitted with the plot plan attached.
- Plot plan marked with property lines, setbacks and gate swing.
- Sunshine 811 ticket requested and the marks confirmed on site.
- Private lines checked: irrigation, septic, pool and outdoor lighting.
- Every post flag set and gates finalized before spacing is locked.
That packet is what moves a fence from an idea to a build date.
#StuartFencing #MartinCountyFencing #PalmCityFencing #JensenBeachFencing #PortStLucieFencing #TreasureCoastFencing #FloridaFencing #FloridaWoodFence #WoodPrivacyFence #PrivacyFenceInstallation #BoardOnBoardFence #ShadowboxFence #CedarFence #PressureTreatedFence #HurricaneFence #CoastalFence #Sunshine811 #HOAFence
Ground-line moisture and wind exposure decide whether a wood privacy fence survives its first hurricane season. AlliedFenceAndGate.com™ handles permitting, 811 utility locates, and inspection coordination for wood privacy fence projects across Martin and Palm Beach Counties. Wood fencing starts at $25 to $45 per linear foot installed, with concrete-set posts and standard hardware included and gates priced separately. Get an instant ballpark on your own fence line with the digital estimator at AlliedFenceAndGate.com™ before anyone digs a hole.
Related Fencing Services
Need a fence or gate on the Treasure Coast?
Licensed, insured, and bonded. Free estimates across Martin, St. Lucie, Indian River & Palm Beach counties.
Call (772) 530-3127