811 Utility Marking Colors Explained for Fence Projects
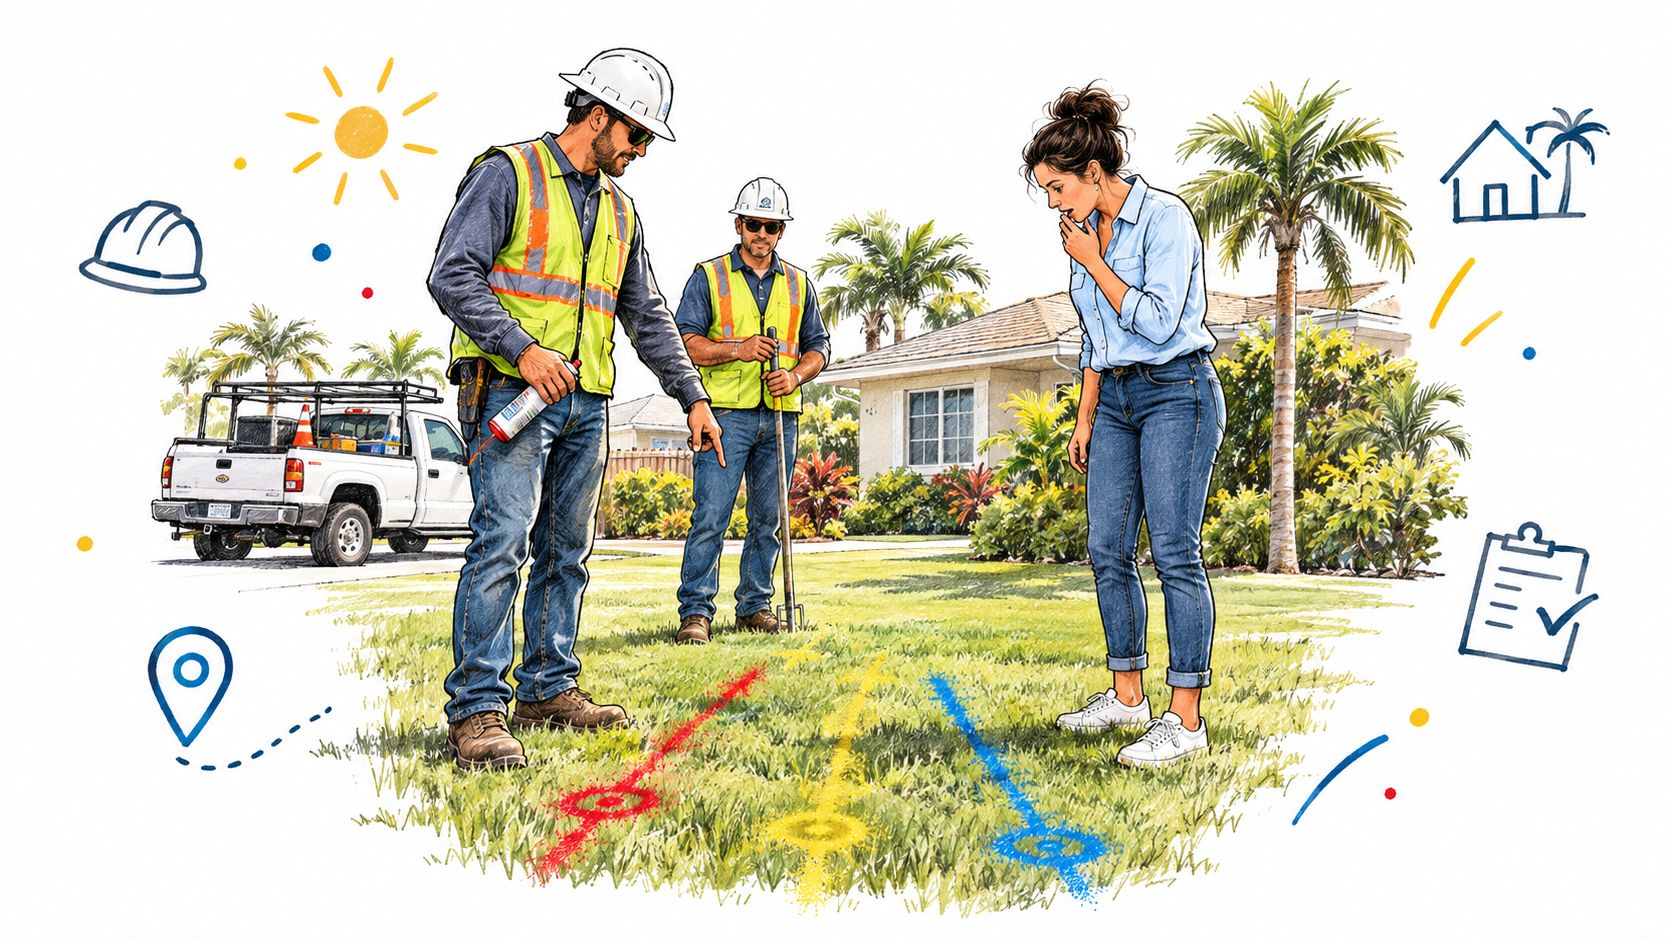
The fence crew hasn't even unloaded the auger yet, and the yard already looks like somebody attacked it with spray paint and little flags. That's usually when the homeowner steps outside, looks at the white, red, yellow, orange, blue, green, purple, or pink marks in the grass, and asks the same question: what exactly do all these 811 utility marking colors mean?
For fence work, that question matters more than many realize. A fence doesn't just skim the surface. It creates a row of narrow, deep holes. That's the kind of digging that can miss a painted line by inches at the surface and still find it underground the hard way. The biggest misunderstanding on residential jobs isn't usually what red or yellow means. It's assuming the marks mean the hole is clear.
Table of Contents
- Why 811 Marks Show Up Before Any Fence Goes In
- The Eight 811 Utility Marking Colors and What Each One Signals
- How the Pre-Mark, Locate, and Dig Sequence Works on a Fence Project
- What Utility Marks Cannot Tell You About Depth and Width
- Florida-Specific Rules for Requesting and Verifying 811 Locates
- Best Practices for Coordinating Marks With Fence Posts and Footings
- Pre-Dig Checklist for Homeowners and Contractors on Fence Day
Why 811 Marks Show Up Before Any Fence Goes In
A typical Treasure Coast fence day starts with a clean layout string, a stack of posts, and a yard that suddenly has white paint and colored flags all over it. The homeowner often thinks something went wrong. It didn't. That paint is part of the job before the first post hole is drilled.
What the paint means before the crew digs
The 811 process exists so the digging area gets identified first, then the buried utilities get marked in a standard way. In North American 811 systems, white is reserved for the proposed excavation area, and the rest of the APWA color code tells crews what utility types may be in conflict along that route, according to Virginia 811 guidance on utility marking colors.
That first white mark matters on a fence line because fences don't excavate an entire open area like a pool or slab. They create repeated deep points along a property boundary. On a long side yard or rear lot line, a clear white pre-mark tells the locators where to focus so they aren't guessing at the dig path.
Why fence jobs are different from light yard work
Homeowners often compare a fence post to planting a shrub. That's the wrong comparison. A shovel for landscaping usually gives a person more feel and more visibility. An auger can bite fast, especially when the soil is dry, sandy, rooted, or packed.
Practical rule: On a fence project, every post location has to be treated like a separate excavation point, not like one harmless line of work.
That's why 811 isn't a courtesy step. It's the baseline for digging responsibly. The locator may only be on site for a short time, and the marks may look simple, but those colors are the field map the crew works from before any machine touches the ground.
A homeowner also usually doesn't get a long explanation from the locator. The marks are left behind, the truck leaves, and now the property owner is standing there with a painted lawn and no clear read on what's safe. That gap is where most confusion starts.
The Eight 811 Utility Marking Colors and What Each One Signals
The APWA Uniform Color Code assigns the standard colors used for underground utility marking: white for proposed excavation, pink for temporary survey markings, red for electric power lines, yellow for gas, oil, steam, petroleum, or other gaseous materials, orange for communication and signal lines, blue for potable water, green for sewer and drain lines, and purple for reclaimed water, irrigation, or slurry lines, as shown in the APWA uniform underground utility color code chart.
For fence work, those colors aren't decoration. They tell the crew what kind of damage a post-hole auger can cause if it crosses the wrong corridor.
APWA 811 color code for fence projects
| Color | Utility Marked | Hazard When an Auger Hits It |
|---|---|---|
| White | Proposed excavation | Not a utility, but the defined work area |
| Pink | Temporary survey markings | Layout reference can be disturbed or lost |
| Red | Electric power lines | Shock, electrocution, arc hazard, outage |
| Yellow | Gas, oil, steam, petroleum, flammable materials | Leak, ignition, fire, explosion risk |
| Orange | Communications, alarm, signal, cable, fiber | Service outage, expensive repair, lost connectivity |
| Blue | Potable water | Flooding, pressure release, water service loss |
| Green | Sewer and drain | Contamination, sewage release, drainage failure |
| Purple | Reclaimed water, irrigation, slurry | Non-potable water release, irrigation damage |
The colors homeowners need to recognize fast
White is the fence line or dig area. It doesn't mark a buried utility. It marks where the crew plans to work.
Pink is temporary survey marking. It's easy to ignore, but it often ties into layout control. If it gets wiped out before the job is verified, the reference can be lost.
Red is electric. A post hole near a red mark changes the whole dig method. Nobody wants an auger tooth finding energized service.
Yellow is gas, oil, steam, petroleum, or other flammable materials. This is the mark that should slow the whole site down immediately.
A yellow mark in a fence run isn't a suggestion to be careful. It's a warning that machine digging may need to stop until the line is safely exposed.
The colors that create expensive surprises
Orange marks communications, alarm, or signal lines. That can mean phone, cable, data, or fiber. An orange hit may not look dramatic at first, but it can create a major outage.
Blue is potable water. If a crew snaps a water service while drilling a post, the site can turn into a muddy mess fast, and the repair often disrupts the whole installation sequence.
Green marks sewer and drain lines. Those are especially tricky around side yards, tie-ins, and older site work where the route may not be obvious from the house layout.
Purple is reclaimed water, irrigation, or slurry. On many residential properties, purple gets mistaken for “just irrigation,” but it still deserves respect before a deep hole goes in.
What works near any color mark
The best habit is simple:
- Treat the mark as a conflict zone: The crew should assume the line is close enough to change the dig method.
- Switch tools early: Shovel work, soft exposure, or vacuum potholing is slower, but it's a lot cheaper than hitting a line.
- Never straddle paint with the auger: If the mark runs through a post location, layout usually needs to change before the hole gets drilled.
How the Pre-Mark, Locate, and Dig Sequence Works on a Fence Project
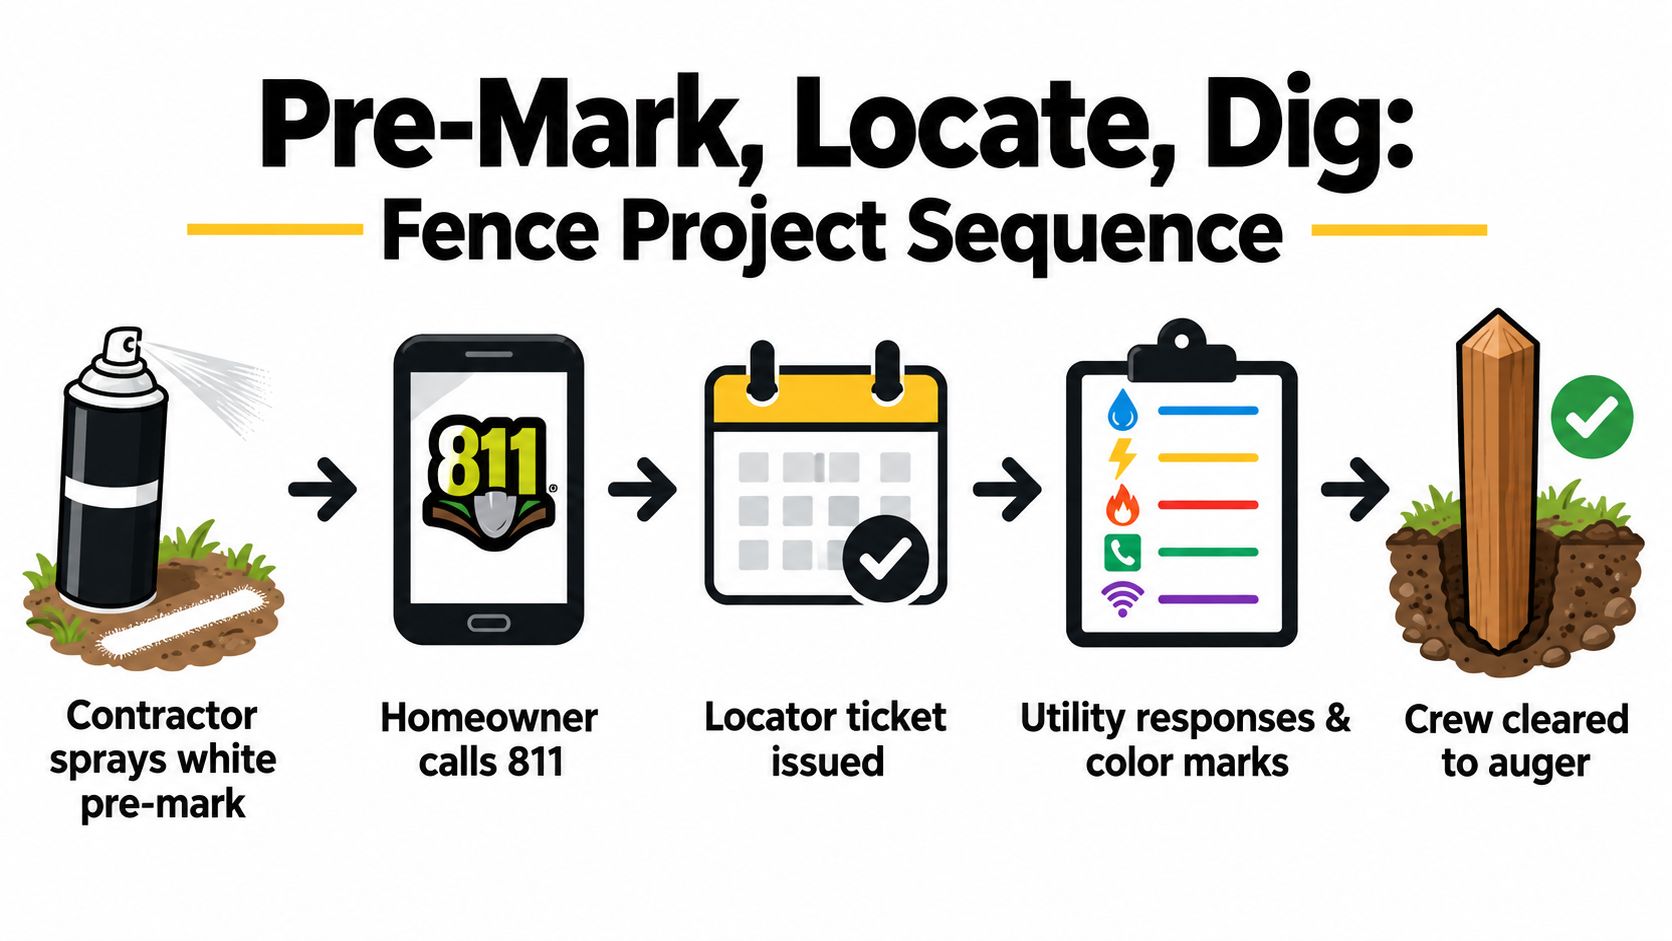
Fence jobs go smoother when the digging sequence is treated like a process, not an event. The safest crews don't just “call 811.” They pre-mark, submit, verify, then dig.
The job starts with white paint
Locators need to know where the actual excavation will happen. In practice, the excavation area is commonly pre-marked in white by the person planning the dig, then utility locators mark the approximate facility paths with the other colors, as explained in Texas 811 guidance on underground utility color code use.
That matters on a fence line because property boundaries can run much farther than the portion being worked that day. A white pre-mark narrows the locate to the actual dig envelope instead of the whole lot.
The sequence that keeps the crew out of trouble
A clean fence locate usually follows this order:
- Fence line gets pre-marked in white. Paint, flags, or both show where the posts or footings are planned.
- The 811 ticket gets submitted. The notice tells member utilities where excavation is planned.
- Locators respond to the ticket. Each utility or contract locator marks its facilities if present in the requested area.
- The crew compares the marks to the layout. Conflicts get found before augering starts.
- Digging only starts after the site is readable. Paint, flags, and responses all have to make sense together.
The practical mistake is assuming the ticket alone clears the work. It doesn't. The ticket is the request. The ground markings are the field information. The utility responses are the confirmation. Those are related, but they are not the same thing.
What crews look for before the auger comes off the trailer
A usable locate has to be visible and coherent. If a long fence run has white marks but only partial utility paint, or if one side yard is marked and another isn't, the crew needs to stop and sort it out before digging.
The safest fence jobs are the ones where the crew walks the line first, not the ones where the auger starts first.
That walk should compare the white pre-mark to every utility mark on the ground, then decide where posts can stay, where they need to shift, and where machine digging is off the table.
What Utility Marks Cannot Tell You About Depth and Width
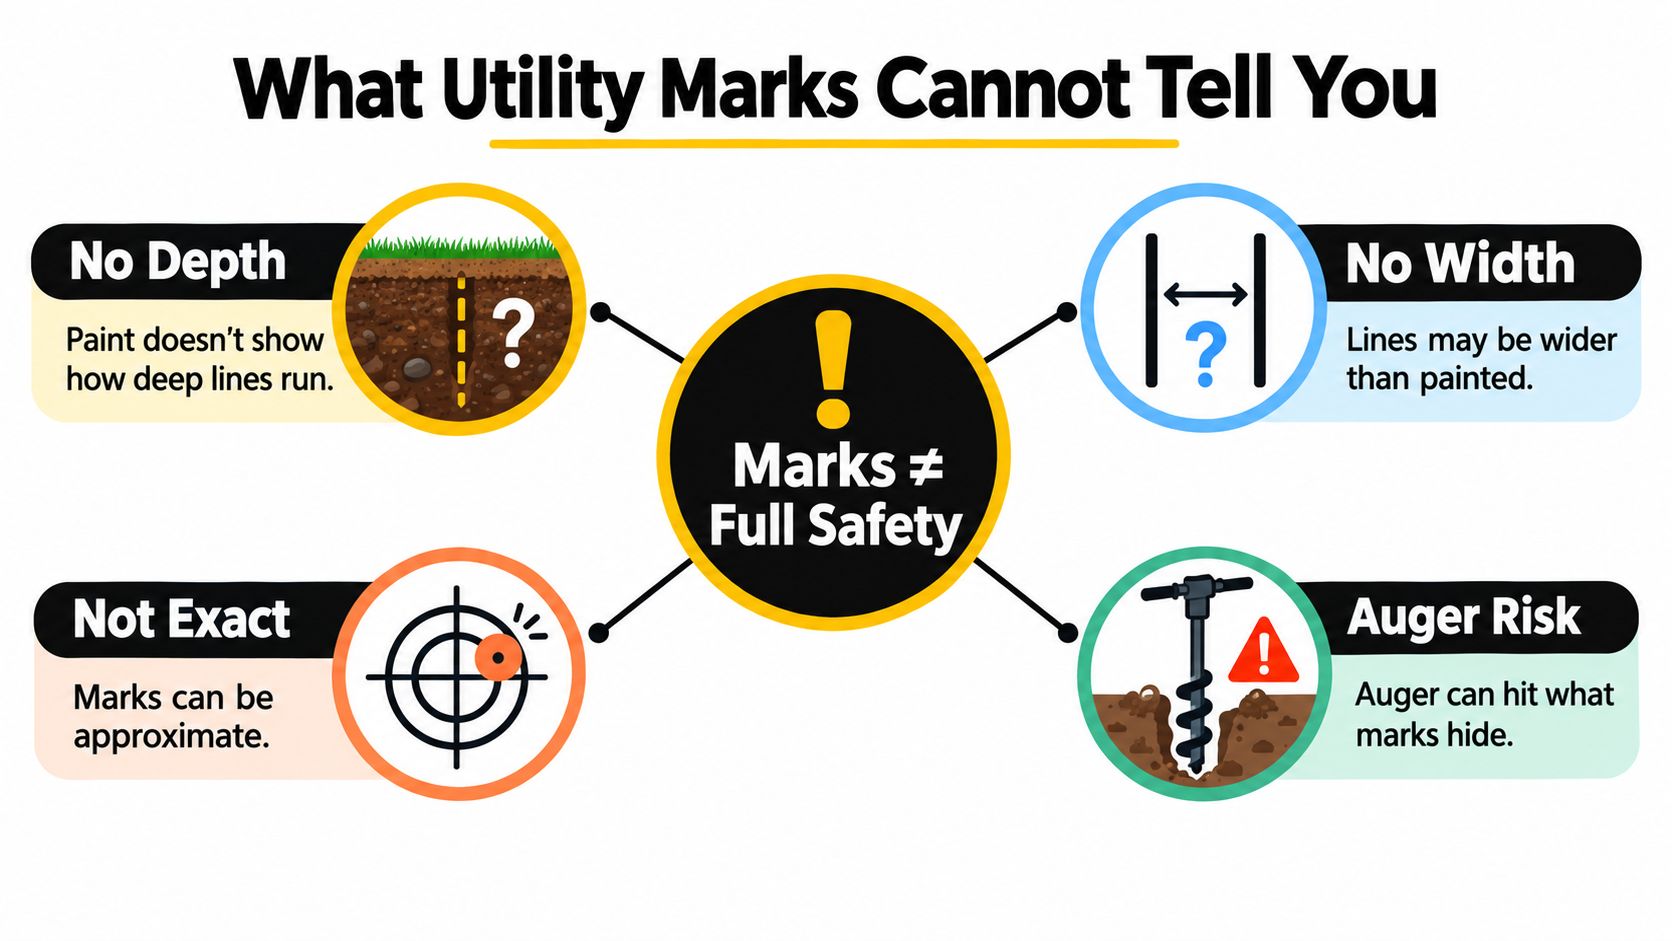
This is the part most homeowners never get told clearly. A yard with locate paint on it is not a cleared yard. It's a yard with known utility paths marked approximately.
Approximate horizontal location is not the same as safe digging
Multiple 811 guidance sources stress the same point. Utility markings show the approximate horizontal location of underground facilities, and they do not show exact depth, as noted in Alabama 811 color code and safety information.
That one limitation explains why fence work gets people into trouble. A post hole is narrow. It looks controlled. It feels precise. But a line that appears offset at the surface may be closer underground, deeper or shallower than expected, or sharing a corridor with another facility that the paint doesn't fully describe.
What the marks leave out
A spray line or a row of flags doesn't answer several field questions:
- Depth: The paint doesn't tell the crew how deep the line is running.
- Width: The mark doesn't tell the crew how wide the occupied corridor really is.
- Exact centerline: The painted route is not an as-built drawing.
- Nearby parallel lines: One marked utility may have another line running close beside it.
For fence posts, that matters because the hole is small across the top but deep enough to intersect utilities that a homeowner assumed were “over there somewhere.”
The right way to read a marked conflict
A painted utility route should be treated like an offset area, not a pinpoint line. If a post lands near a mark, that's where hand exposure, careful probing by approved methods, or vacuum excavation starts to make sense.
Field judgment: A locate narrows where the crew must dig carefully. It never guarantees a post hole is clear.
That's the mindset that prevents a lot of preventable hits. The paint tells the crew where to slow down. It doesn't give permission to drill blind.
Florida-Specific Rules for Requesting and Verifying 811 Locates
In Florida, the workflow has to be managed with the same discipline as the layout and permit set. A fence contractor or homeowner can place the locate request online or by phone through Sunshine 811, but the important part isn't just making the request. It's verifying the responses before the dig date arrives.
What has to happen before legal digging starts
The standard working rule in Florida is to allow the notified utility members time to respond before excavation begins. On a real fence project, that means the crew needs to account for the waiting window in the schedule and avoid promising a dig day that outruns the ticket.
For homeowners dealing with HOA approvals, municipal permits, or easement questions, the locate request is only one layer of preconstruction planning. Property restrictions, setback rules, and local code issues still need to line up with the fence layout. For that side of the project, Florida fence law considerations are often just as important as the locate itself.
Florida 811 response codes and what they mean on a fence job
| Response Code | Meaning | Action for Fence Crew |
|---|---|---|
| Marked | Utility presence was identified and marked on site | Compare marks to layout before digging |
| Clear or no conflict | Utility reports no conflict in the marked work area | Continue reviewing all other utility responses |
| No access or unable to complete | Locator couldn't finish because the site couldn't be fully reached or interpreted | Stop and resolve access or scope issue |
| Partial marking or unclear field condition | Some portion appears unresolved on site | Do not auger through the unresolved area |
| No response visible in field | Ticket may exist, but the ground doesn't match expectations | Verify before digging |
What doesn't work in the field
Crews get into trouble when they treat faded paint like current paint, or when they assume one completed utility response means the whole site is ready. It also doesn't work to rely on a screenshot alone if the marks on the ground don't match the planned fence route.
A practical Florida habit is to reconcile three things together: the ticket record, the utility responses, and the field markings. If one of those is missing or unclear, the fence line isn't ready for machine digging.
Best Practices for Coordinating Marks With Fence Posts and Footings
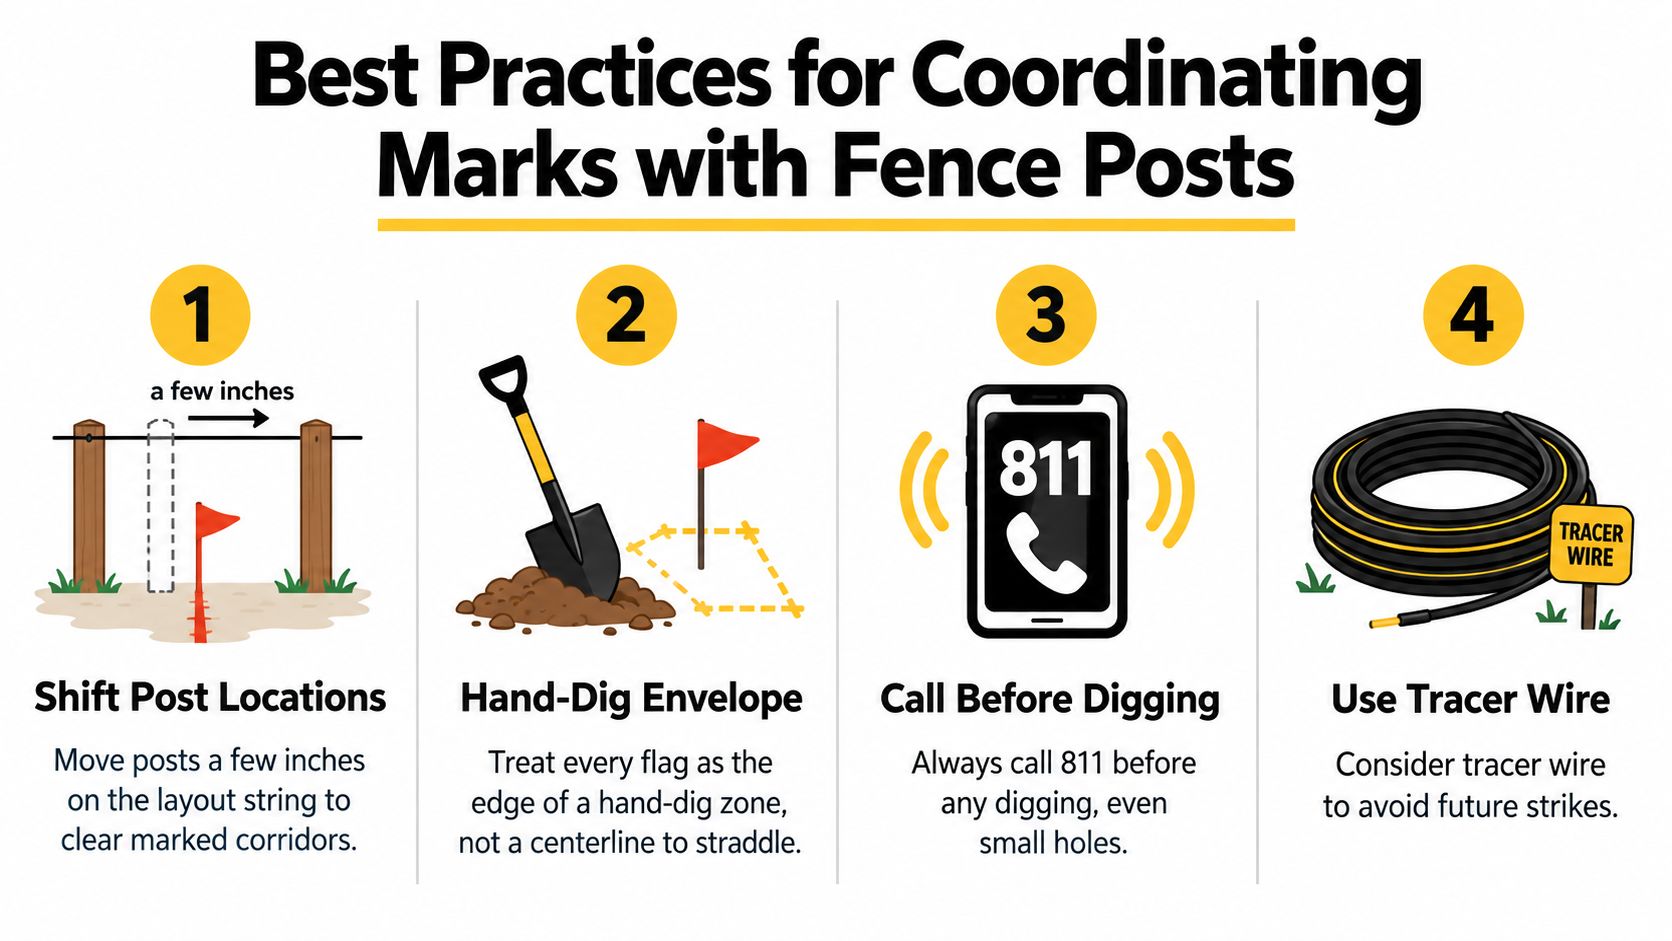
The safest fence layouts treat every utility mark as the edge of a protected work envelope. That's a better mindset than treating the paint stripe like a thin centerline that an auger can “just miss.”
What actually works on a fence line
The most reliable move is often the simplest one. Shift the post location a few inches along the layout string if that clears the marked corridor and still works with the panel spacing or gate opening.
When the conflict can't be solved by shifting layout, tool choice matters next. A shovel, hand-dig exposure, or vacuum potholing is slower than an auger, but slower is the whole point when the site has a marked utility crossing.
For properties where the boundary itself is still being confirmed before final layout, clear line control matters just as much as utility control. A property owner sorting out corners and setbacks can use practical guidance on how to find property lines for a fence before the utility marks and post spacing are finalized.
Habits that prevent the common strike
- Refresh the site walk: Before digging starts, the crew should re-check that paint and flags are still visible and readable.
- Brief every installer: The laborer carrying posts and the operator running the auger both need the same understanding of the marked conflicts.
- Stop on any uncertainty: If a mark looks too faded, incomplete, or contradictory, the right move is to pause.
- Document the field condition: Some contractors, including AlliedFenceAndGate.com™, build 811 locates and site documentation into the installation process so the ticket, layout, and photos stay tied together.
What never helps
Trying to split the difference over a marked line is one of the worst habits on a fence site. So is covering up a nicked utility and pretending it didn't happen. If a line is contacted, work stops and the utility issue gets handled directly. That delay is frustrating. It's still better than compounding the damage.
Pre-Dig Checklist for Homeowners and Contractors on Fence Day
Fence day goes smoother when somebody runs a simple checklist before the first machine starts. Not a vague safety talk. An actual sequence tied to the locate, the marks, and the holes that are about to be drilled.
The checklist that should happen on site
- Confirm the ticket information: Make sure the active Sunshine 811 request and utility responses are available to the crew on site.
- Walk the full fence route: Check that the paint and flags still match the planned fence run and haven't been lost to mowing, weather, or traffic.
- Photograph the markings: Timestamped phone photos help document what the site looked like before digging began.
- Re-mark the work area in white if needed: If the original fence path is hard to read, refresh the proposed excavation line so the work area is clear.
- Identify hand-dig zones: Any post or footing near a marked conflict should be reviewed for hand exposure before an auger is used.
- Assign stop-work authority: Someone competent on site has to be able to halt the dig immediately if the field conditions don't match the locate.
- Keep layout and product decisions coordinated: If the fence style, post spacing, or gate placement changes late, that can shift conflict points too. Homeowners still choosing materials sometimes benefit from seeing how layout affects installation details in a board-on-board fence installation guide.
Why skipped steps create risk
The legal protection of the 811 process only helps when the procedure is followed all the way through. If the marks are unreadable, the responses are incomplete, or the crew digs outside the planned area, the protection starts to fall apart.
A marked yard is better than an unmarked yard. But for fence work, the safety comes from reading the marks correctly, respecting what they don't tell you, and changing the dig method before the auger creates a problem underground.
AlliedFenceAndGate.com™ handles fence installation, permitting coordination, and 811 utility locate scheduling as part of real-world projects across the Treasure Coast and northern Palm Beach County. Homeowners who want a contractor that understands how utility markings affect post layout, gate placement, and safe digging can visit AlliedFenceAndGate.com™ to review services and start planning the job correctly.
#MartinCountyFencing #PalmBeachCountyFencing #TreasureCoastFencing #StuartFencing #JupiterFencing #JensenBeachFencing #PalmCityFencing #HobeSoundFencing #PortSaintLucieFencing #TequestaFencing #FloridaFenceContractor #FenceInstallation #PrivacyFence #WoodFence #VinylFence #AluminumFence #ChainLinkFence #PoolFence #GateInstallation #UtilityLocate
Related Fencing Services
Need a fence or gate on the Treasure Coast?
Licensed, insured, and bonded. Free estimates across Martin, St. Lucie, Indian River & Palm Beach counties.
Call (772) 530-3127